
Mastering how to rig Dummy Flashers on your downrigger system is one of the most effective ways to attract aggressive West Coast salmon without fighting the underwater drag of an in-line flasher. As a professional charter skipper, one of the most common questions I get from anglers on the boat is: “What is your favourite go-to setup?” Last season, my staple producer was a Gibbs 4.0 Herring Aid paired with either a Purple Haze or Gold Betsy flasher. That combination smashed Chinook consistently, though I would switch to a UV Ghost Car hoochie when the bite slowed down during midday light shifts. However, when salmon are scattered or stubborn, adding independent flash attractors to your cannonball can completely transform your success on the water.
⚠️ REGULATORY & SAFETY NOTE
Always double-check local hook limits, single barbless rules, and open fishing zones on the DFO BC Tidal Waters Sport Fishing Guide before deploying multi-line downrigger gear.
Light and Flash: The Power of Attraction
Glow-coated or powder-dipped cannonballs on your downrigger provide a strong baseline visual target underwater. But why stop there when you can add significantly more optical reflection? By running dummy flashers directly off the cannonball or downrigger cable, strike rates increase dramatically across all Pacific salmon species. More flash draws fish from greater distances, creating the illusion of an active feeding school or a tight bait ball holding off the bottom structure.
While commercial trollers have used dummy attractors for decades when targeting Sockeye and Chum, they are equally deadly for deep-water Chinook (Springs) and surface-feeding Coho. The extra vibration and light pulse bring curious fish right into your lure spread.
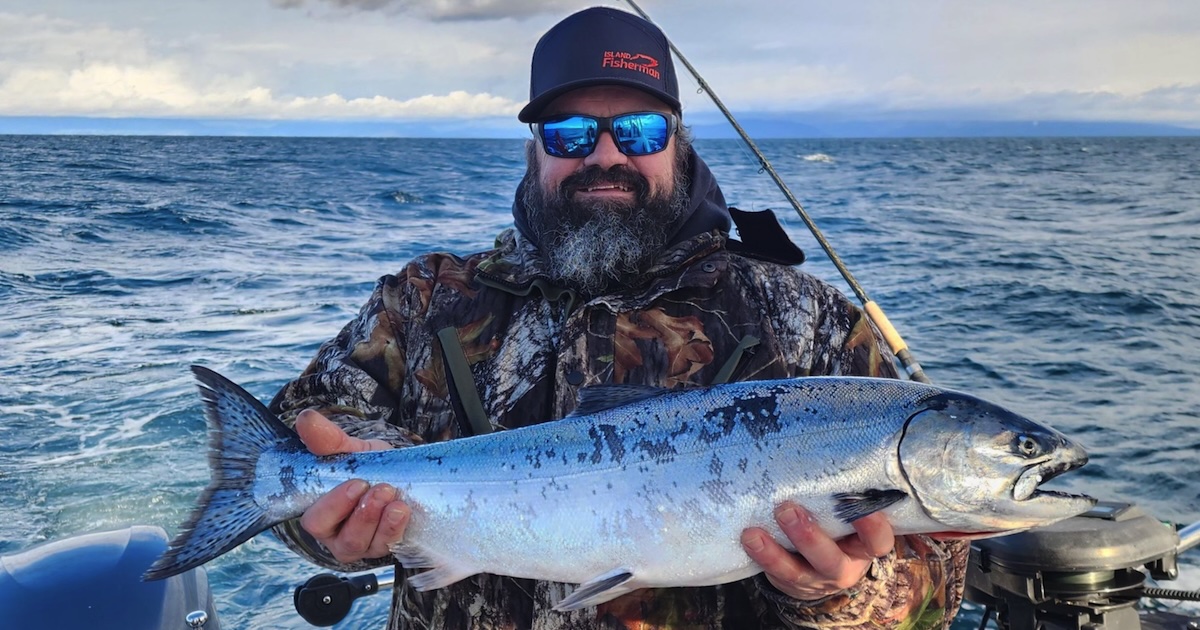
Dummy flasher setups clipped directly to downrigger weights maximize visual attraction in deep coastal waters.
Creating Your Own Bait Ball Illusion
The primary goal of running dummy flashers is to simulate micro-schools of fleeing herring, sandlance, or pilchards. You can utilize almost any style of rotating blade or inline attractor. Simply clip your chosen blades directly to your cannonball eyelet or weight snap. Prepping your cannonballs with high-glow marine paint or rubber coating adds an extra luminescent core to your artificial bait ball that shines in dark, deep water.
Types of Commercial & DIY Dummy Flashers
There are several proven options on the market, ranging from pre-rigged daisy chains to custom DIY setups:
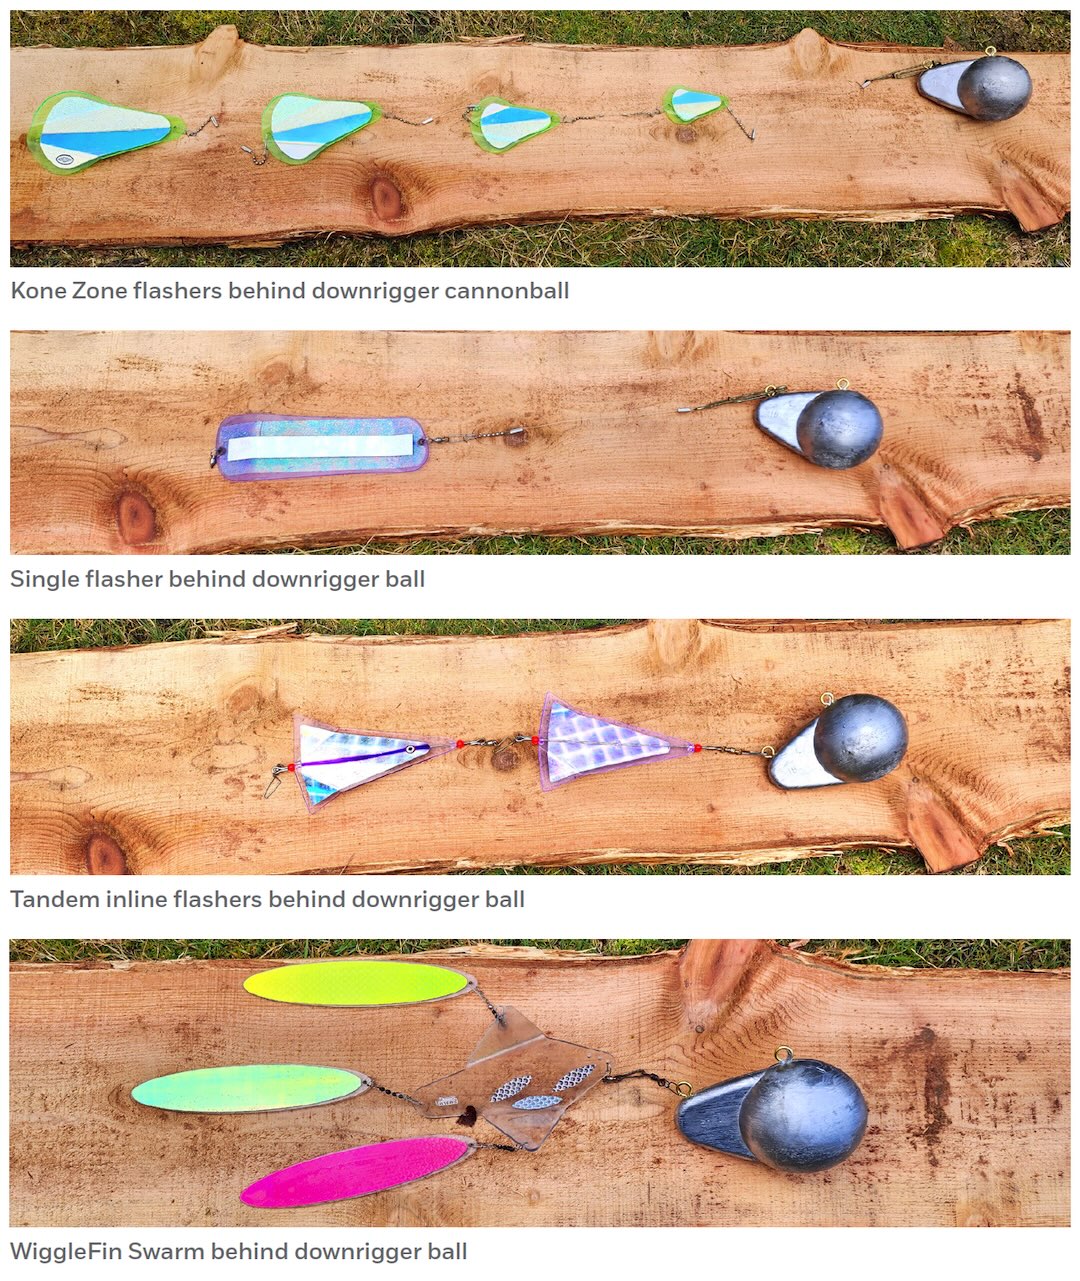
- Commercial Daisy Chains: Products like the Kone Zone Daisy Chain produce continuous slow-rotation flash without excessive cable twist.
- Multi-Blade Agitators: Setups like the WiggleFin Swarm emit high-frequency pulses that mimic panicked baitfish.
- DIY Inline Chains: You can build custom chains using two or three Gibbs 8-inch inline flashers linked with heavy monofilament and ball-bearing swivels.
Which style you choose depends on your budget and personal preference. The ultimate goal remains the same: output maximum light reflection and hydro-acoustic vibration underwater.
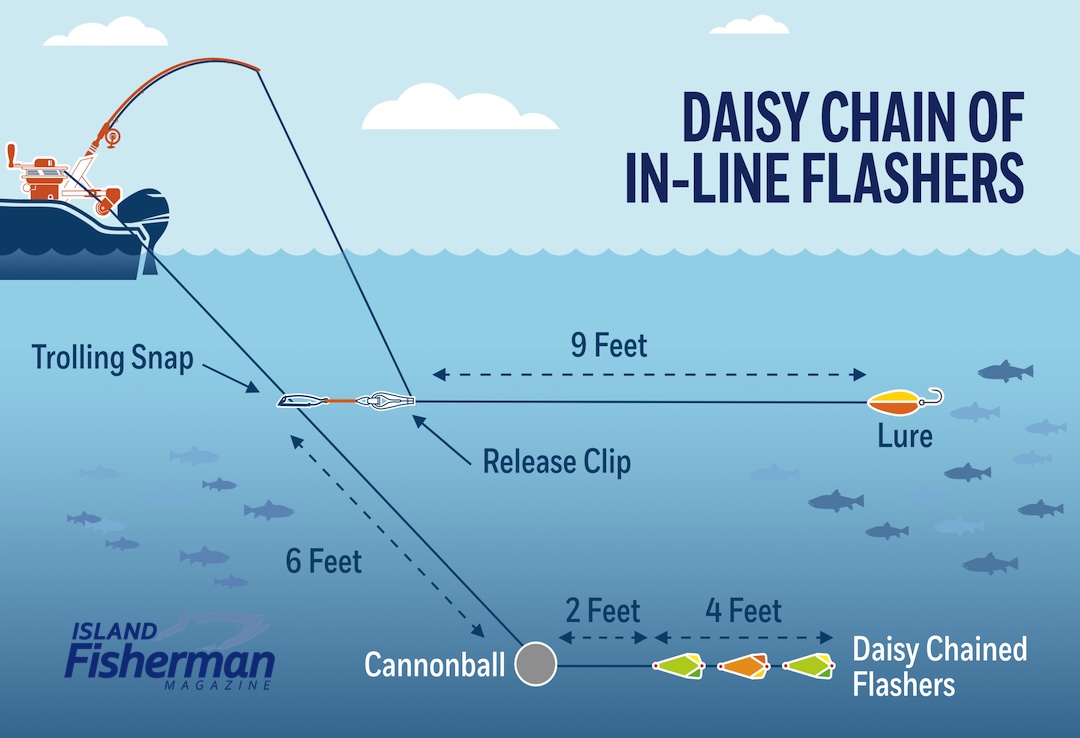
A daisy chain of inline flashers connected to create a high-visibility attractor spread.
How To Rig and Deploy Dummy Flashers
Proper rigging prevents birdnests and guarantees all components work in tandem. Follow these step-by-step guidelines when lowering gear:
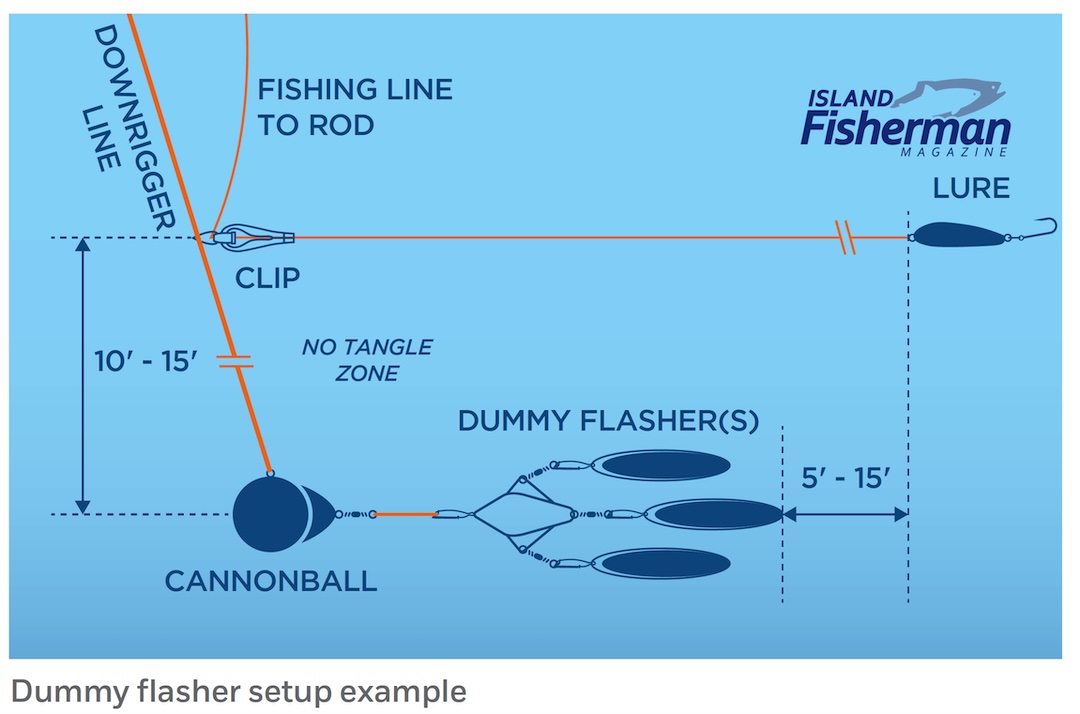
Rigging diagram illustrating main fishing line placement above the dummy flasher attraction zone.
- Secure Attractor Connections: Attach your dummy flasher or daisy chain directly to the cannonball using heavy-duty locking snaps to prevent losing gear during bottom taps.
- Position Fishing Line Clip: Attach your main line downrigger clip 10 to 15 feet above the dummy flasher on the downrigger cable. This distance allows your trailing lure to dance cleanly behind the artificial bait ball without fouling.
- Controlled Speed Descent: Lower your downrigger weight at a slow, controlled pace. Dropping weights too fast causes the dummy flasher to tumble upward, wrapping around your main line release clip and creating a severe tangle. Keep thumb pressure on the spool during descent.
💡 PRO ANGLER TIP: DESCENT & TENSION MANAGEMENT
Always keep light rod tension while lowering downrigger gear. Watch the dummy flasher rotate clear of the cable as it submerged. If the main rod tip bounces erratically during descent, stop immediately—your leader may have spun around the downrigger wire.
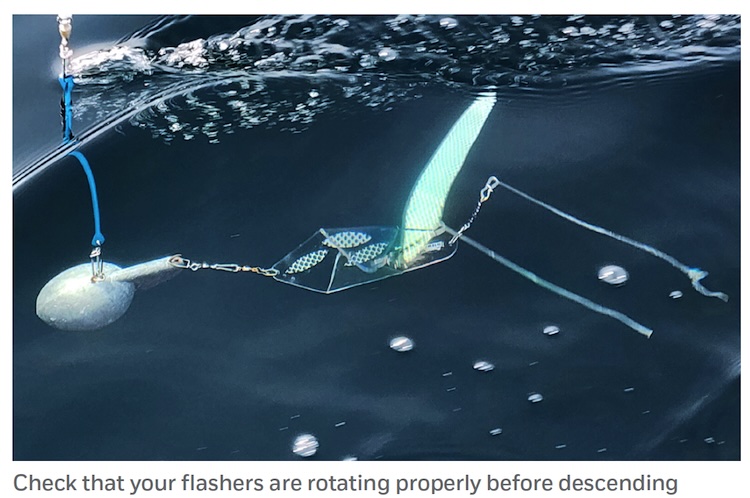
Continuous rotation produces sound pulses and visual flash that draw salmon into your gear spread.
Fishing “Naked”: Spoons and Plugs Without In-Line Drag
One of the biggest advantages of utilizing dummy flashers on your downrigger weight is the ability to fish spoons, plugs, or live bait “naked”—without an in-line flasher tied directly to your main fishing line. When a salmon strikes, the line releases from the downrigger clip, leaving you with an uninhibited, direct connection to the fish.
Without the heavy resistance and side-to-side drag of an in-line flasher, you feel every headshake and run. It makes the fight infinitely more enjoyable and significantly reduces thrown hooks near the net.
Want to run multiple rods off a single downrigger cable? Read our detailed guide on Stacking Fishing Lines Like a Boss for diagrams and positioning techniques.
About the Author & Island Fisherman Magazine
Written by Tyler Kaye (owner and lead guide at Big Fish Charters) and field-tested in British Columbia coastal waters. Explore more verified tackle guides and print subscriptions at Island Fisherman Magazine.