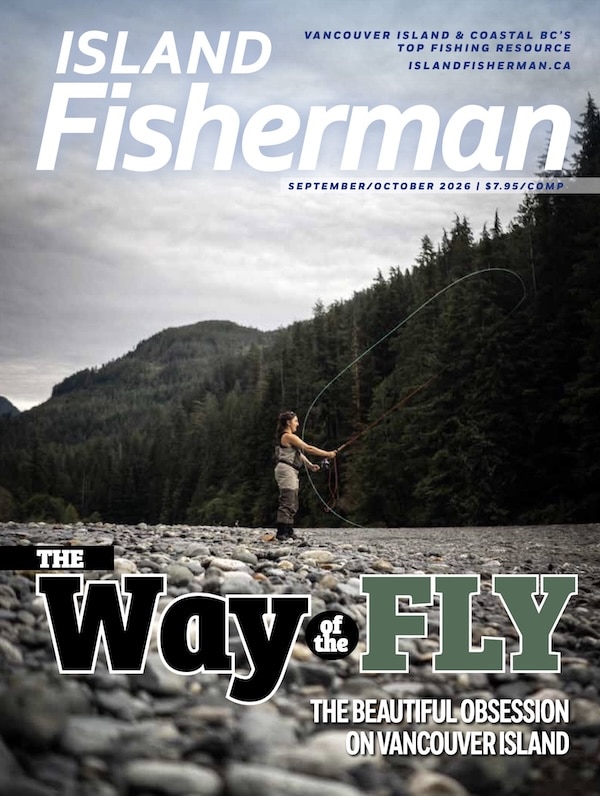


Learning how to make salmon and steelhead spinners gives West Coast river anglers complete control over lure weight, blade vibration, and depth control while saving serious money on terminal tackle.
With retail prices climbing and rocky river bottoms claiming expensive hardware every season, mastering how to make salmon and steelhead spinners on your home bench is one of the most practical skills you can develop. Beyond the significant cost savings, nothing beats the satisfaction of watching your float bury down or your rod load up when an aggressive fish hammers a lure you crafted yourself.
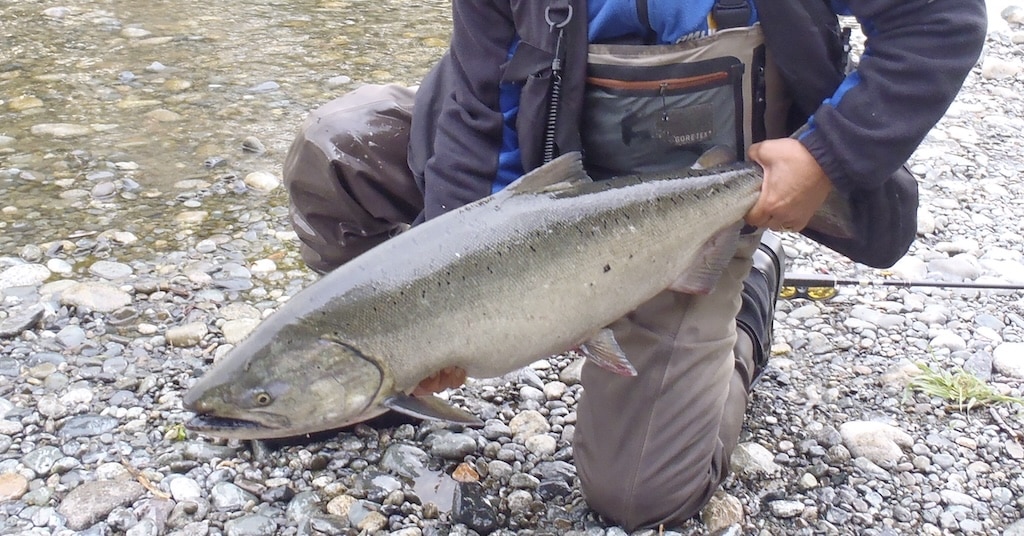
Store-Bought vs. DIY Spinning Lures
Commercial factory lures from top tackle brands are widely available and come balanced straight out of the blister pack. However, store-bought lures feature distinct drawbacks: premium retail prices, fixed weights that cannot adapt to river flow, and treble hooks that require immediate replacement to fish legally in non-tidal streams. When you learn how to make salmon and steelhead spinners yourself, you eliminate these restrictions entirely.
- Store-Bought Advantages: Factory-tested balance, pre-tuned sonic bodies, and ready-to-fish convenience.
- Store-Bought Drawbacks: High retail cost, rigid weight distribution, and stock treble hooks that must be clipped.
- DIY Advantages: Total customization of blade finishes, hook styles, zero-twist swivel chains, and a fraction of the cost per lure.
- DIY Drawbacks: Requires workbench patience and a dedicated set of split-ring pliers.
Choosing the Right Spinner Blade Profile
The blade is the motor of any spinning lure. Rotating through running water, it throws off flash, sonic clicks, and heavy lateral displacement vibrations that trigger territorial aggression. Selecting the right blade geometry is step one when planning how to make salmon and steelhead spinners.
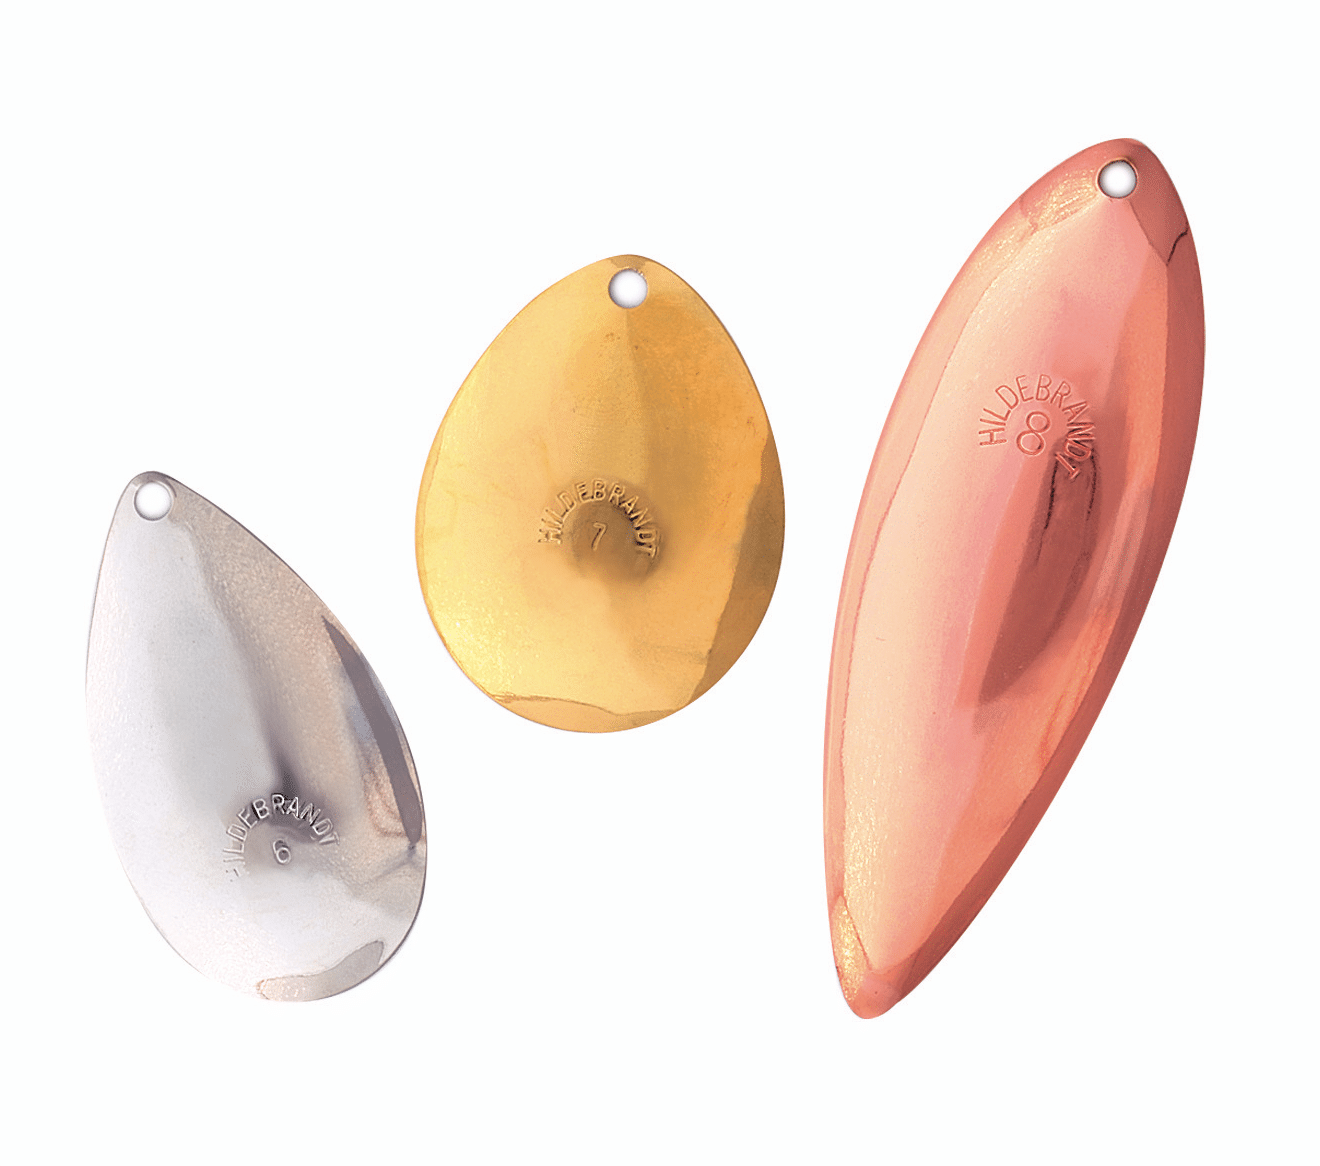
1. Colorado Blades (Slow Water & Murky Clarity)
The wide, cupped profile of the Colorado blade catches maximum current at the slowest retrieve speeds. Spinning outward on a wide 45-to-50-degree angle, it emits maximum acoustic thump and surface flash. This lift keeps the lure riding high, making it exceptional in shallow tailouts, walking-speed flows, and silty freshets.
2. Willow Leaf Blades (Heavy Current & Deep Chutes)
Narrow and streamlined, the Willow Leaf blade slices through fast water with minimal drag on a tight 25-degree rotation. Because it produces minimal upward lift, it sinks rapidly into deep canyon pools and heavy chutes where chinook and coho stack near bottom structure.
3. Indiana Blades (Medium-Flow Riffles)
Teardrop-shaped Indiana blades offer the perfect balance between the hard thump of a Colorado and the streamlined dive of a Willow Leaf. They work best through moderate river riffles, putting out a steady pulsating flash in variable water conditions.
When fishing British Columbia non-tidal rivers and streams, provincial regulations mandate a single barbless hook. All custom spinners built for river salmon and steelhead must be rigged with a barbless Siwash or octopus hook. Always verify seasonal closures, bait bans, and classified water requirements via the DFO Sport Fishing Guide before fishing.
Component Sizing & Hardware Balance
The most common pitfall when discovering how to make salmon and steelhead spinners is mismatched hardware. Small swivel eyes or undersized split rings choke blade rotation and cause binding. Match your terminal hardware precisely using this baseline formula:
- Size #4 Blades: Rig with a #1/0 barrel swivel and a #1/0 split ring.
- Size #5 Blades: Pair with a 2/0 barrel swivel and a #4 split ring.
- Willow Leaf Setups: Add an extra swivel and split ring to the chain to space the hook clear of the longer blade body.
- Hook Selection: An open-eye, straight-eye long-shank Siwash hook gives the best eye clearance. Keep the hook eye near the blade base so the point rides completely exposed behind the lure.
How to Make Salmon and Steelhead Spinners: Step-by-Step Assembly
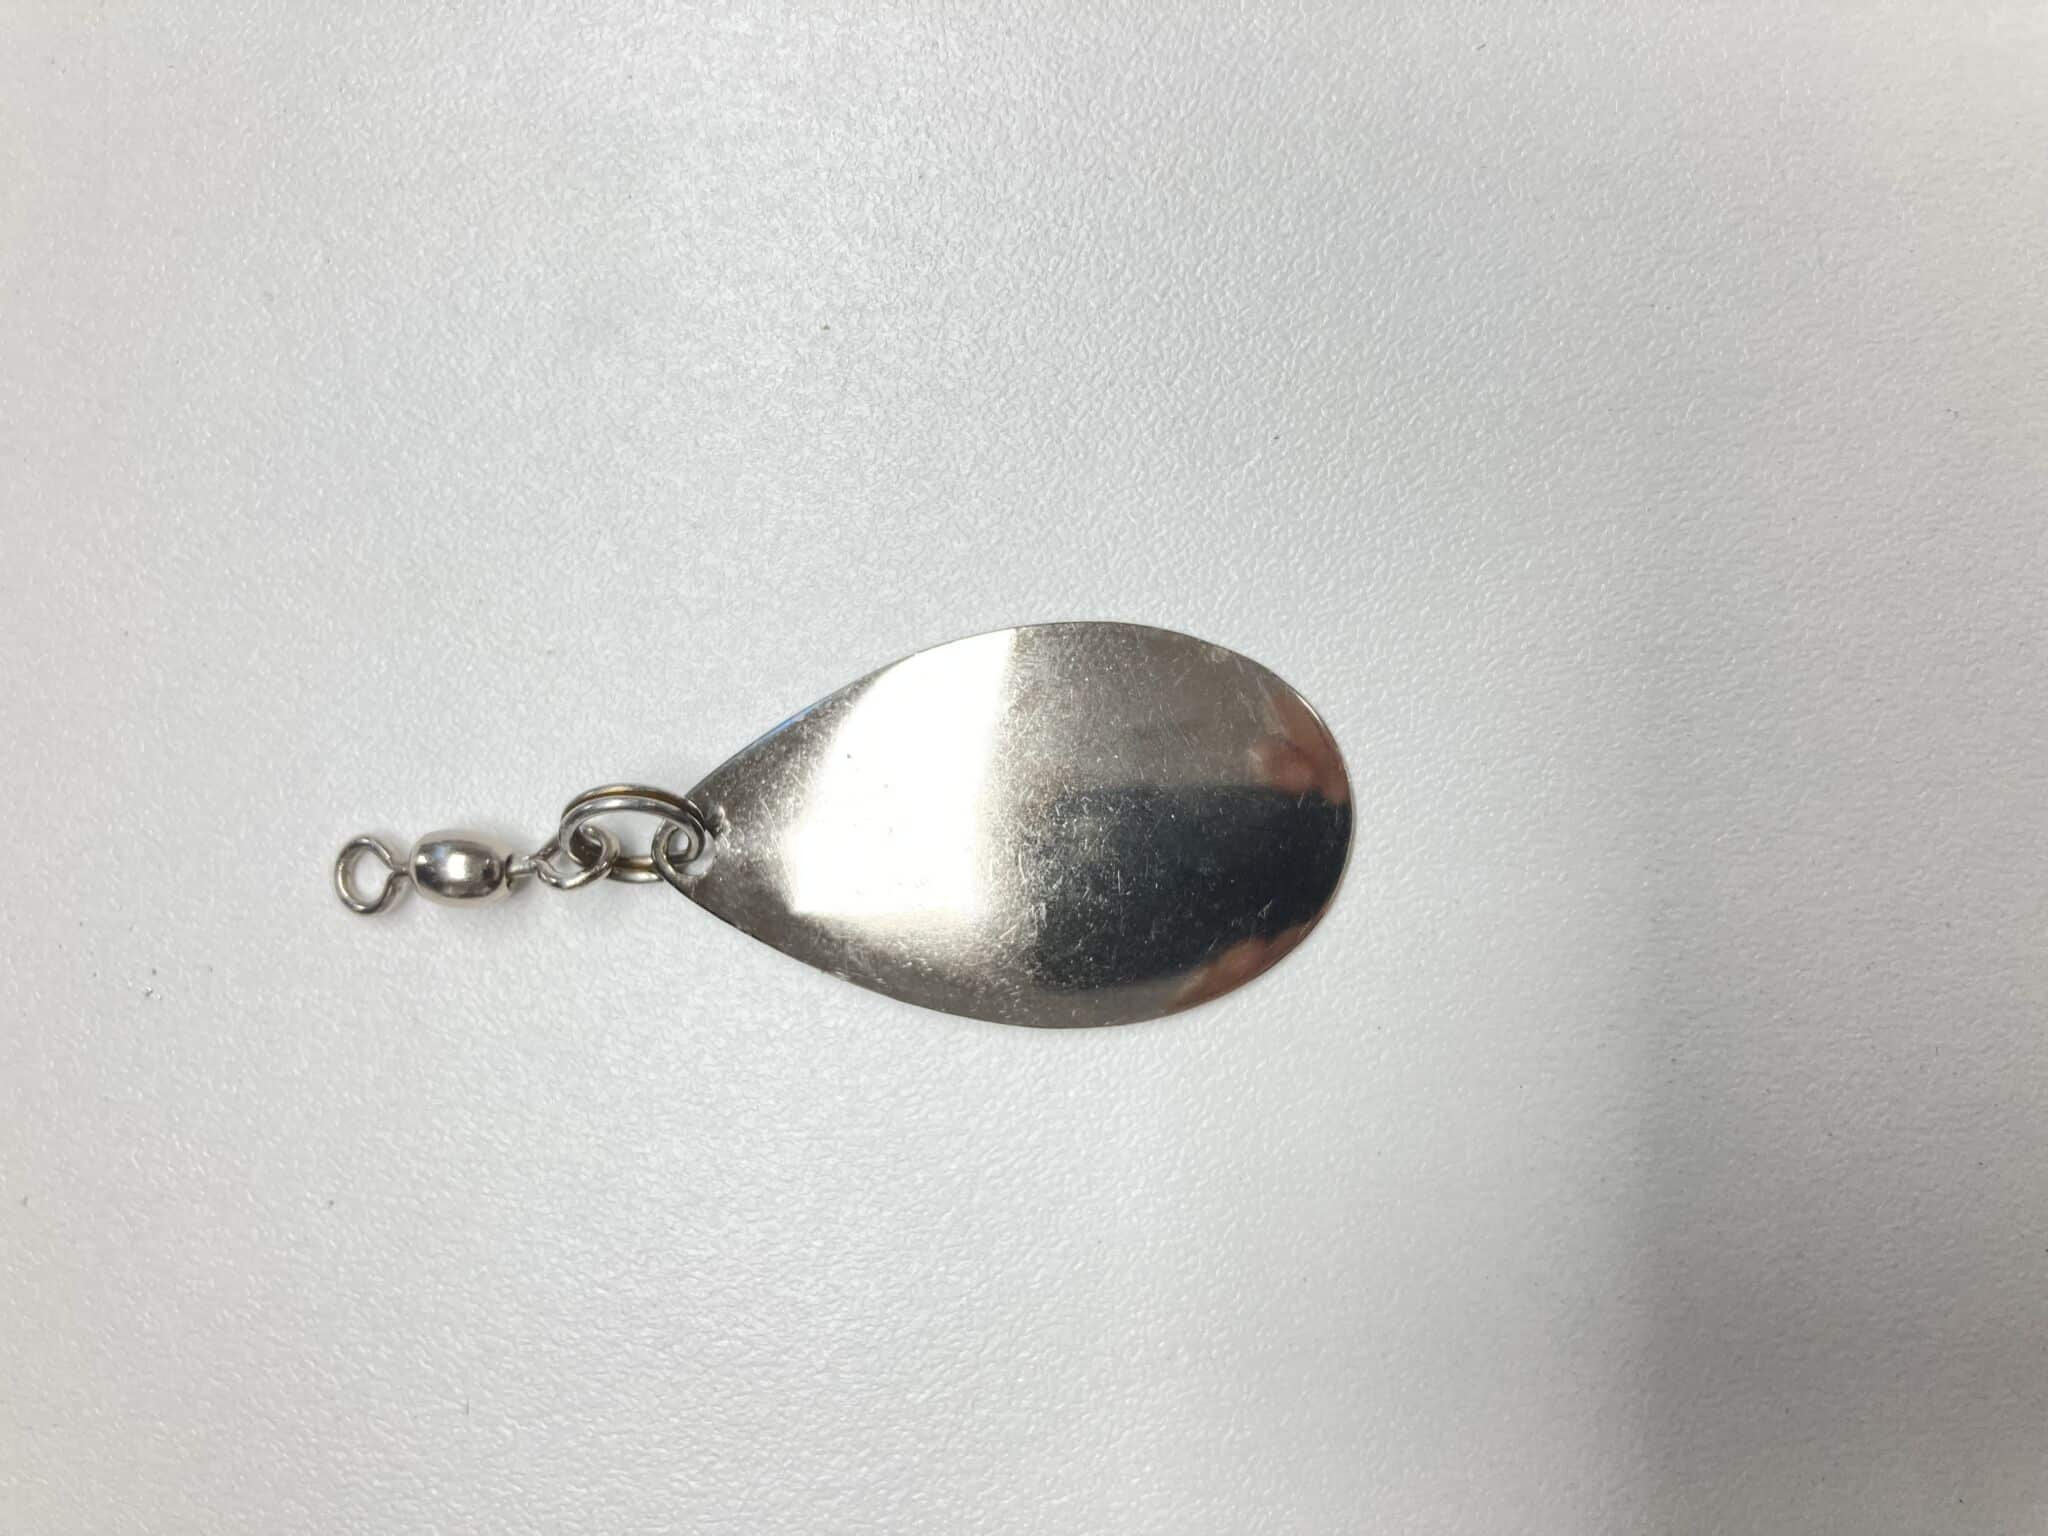
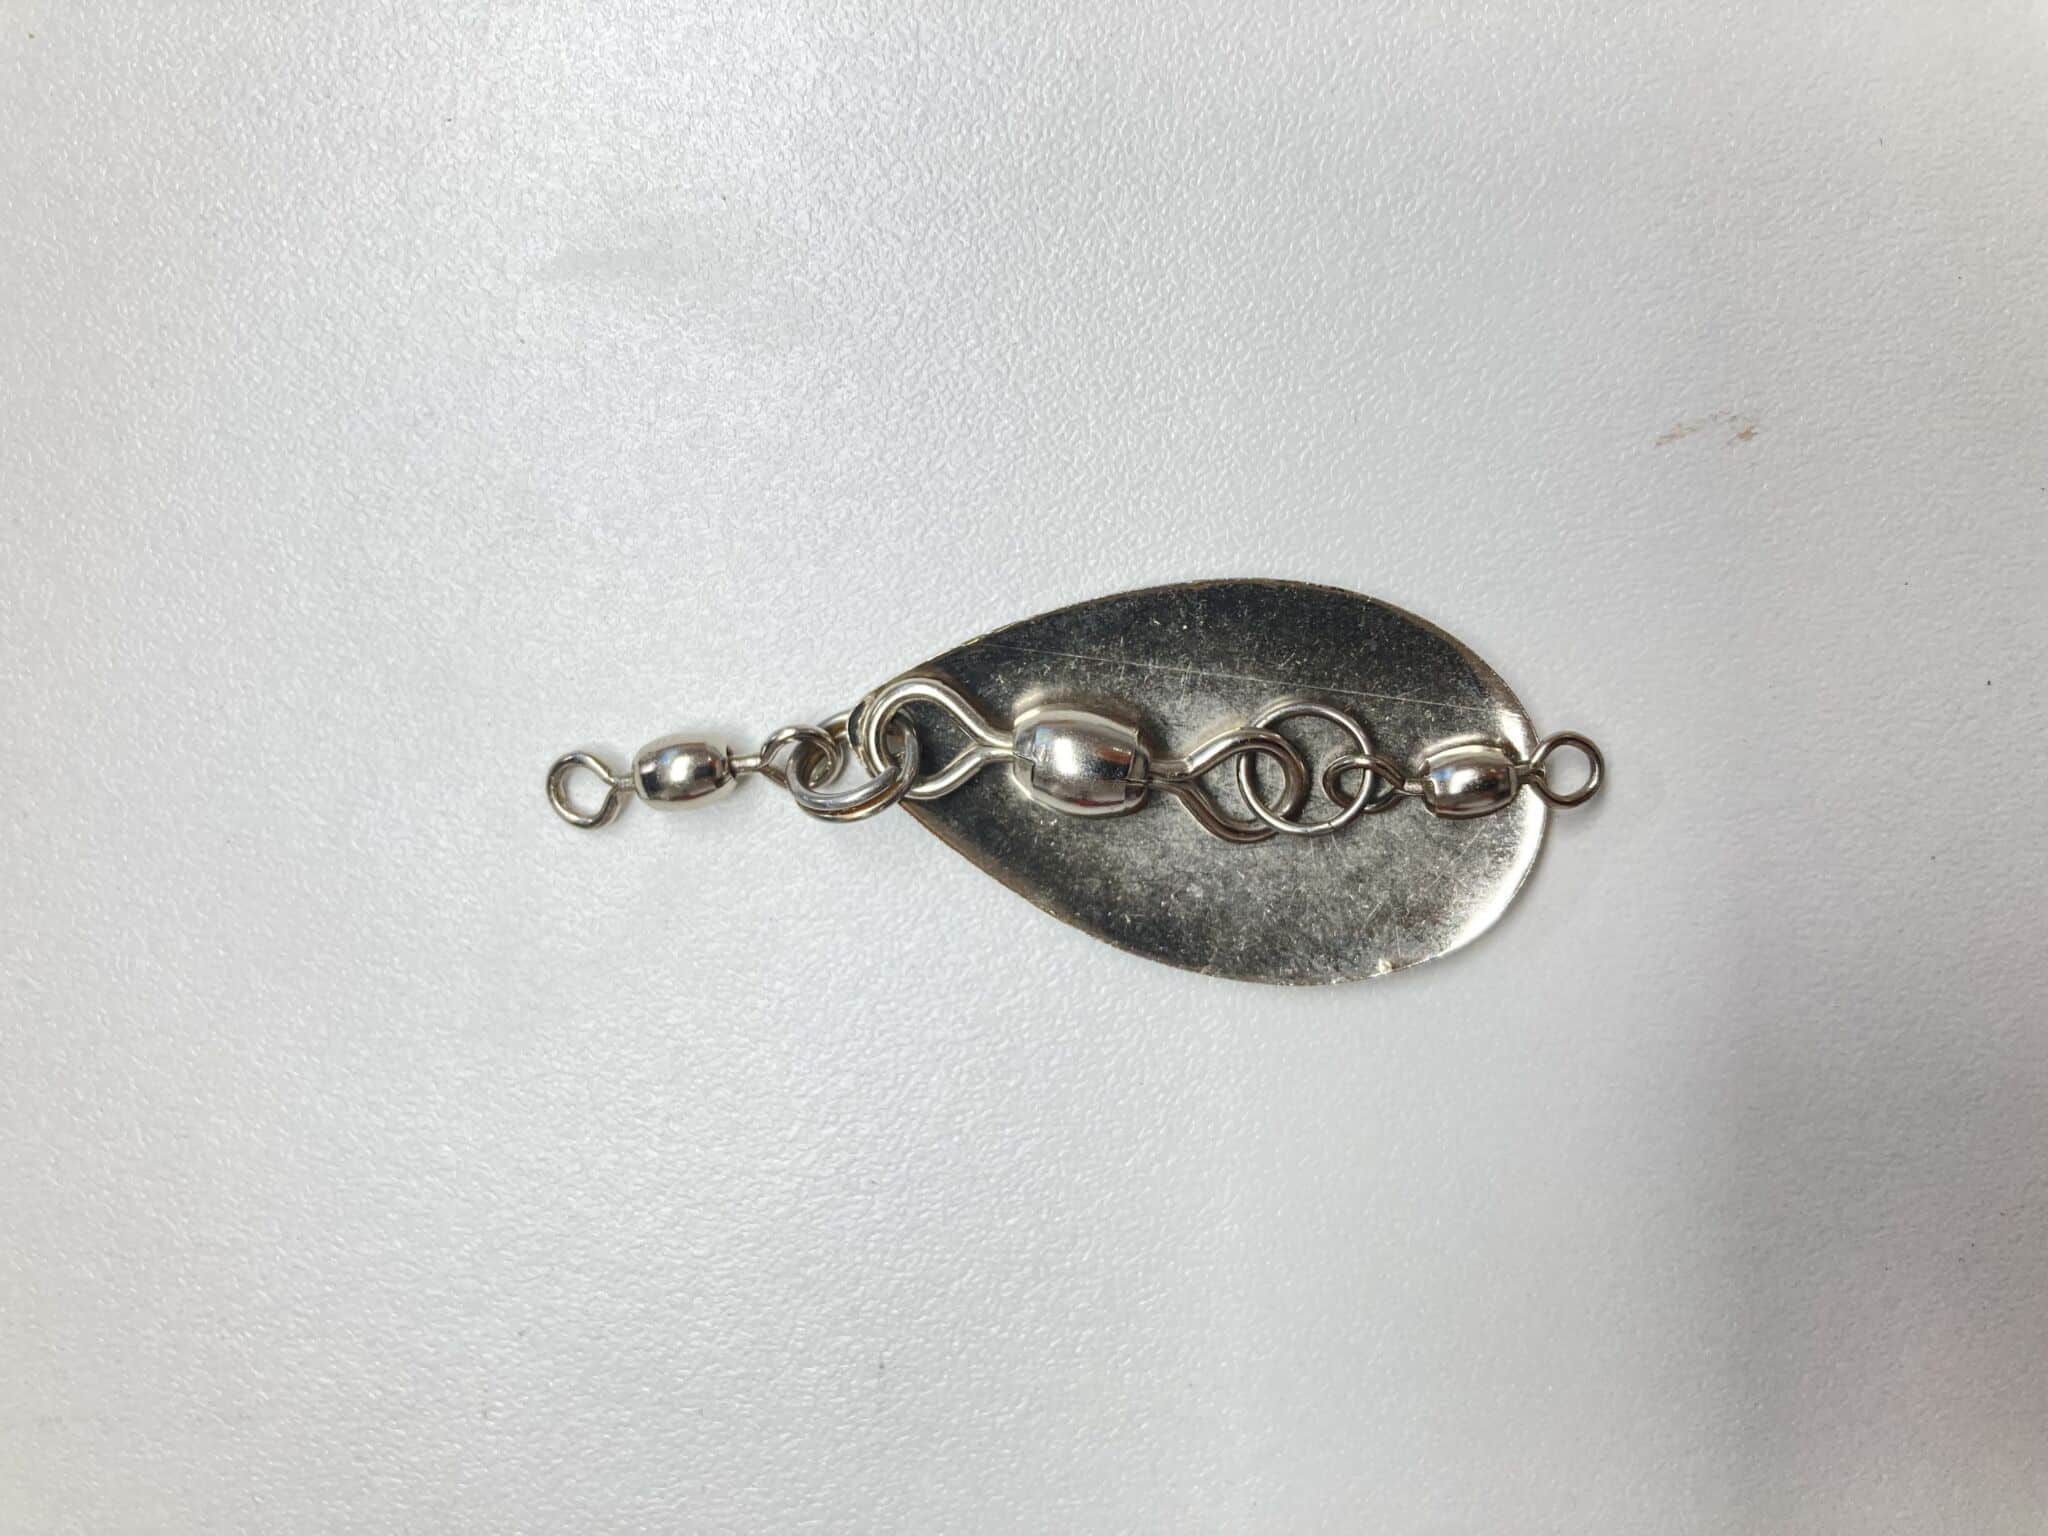
Articulated unweighted spinners are the gold standard for river drift fishing. Assembled with two crane swivels, two split rings, a spinner blade, and an open-eye hook, this setup eliminates rigid wire shafts entirely while eliminating line twist.
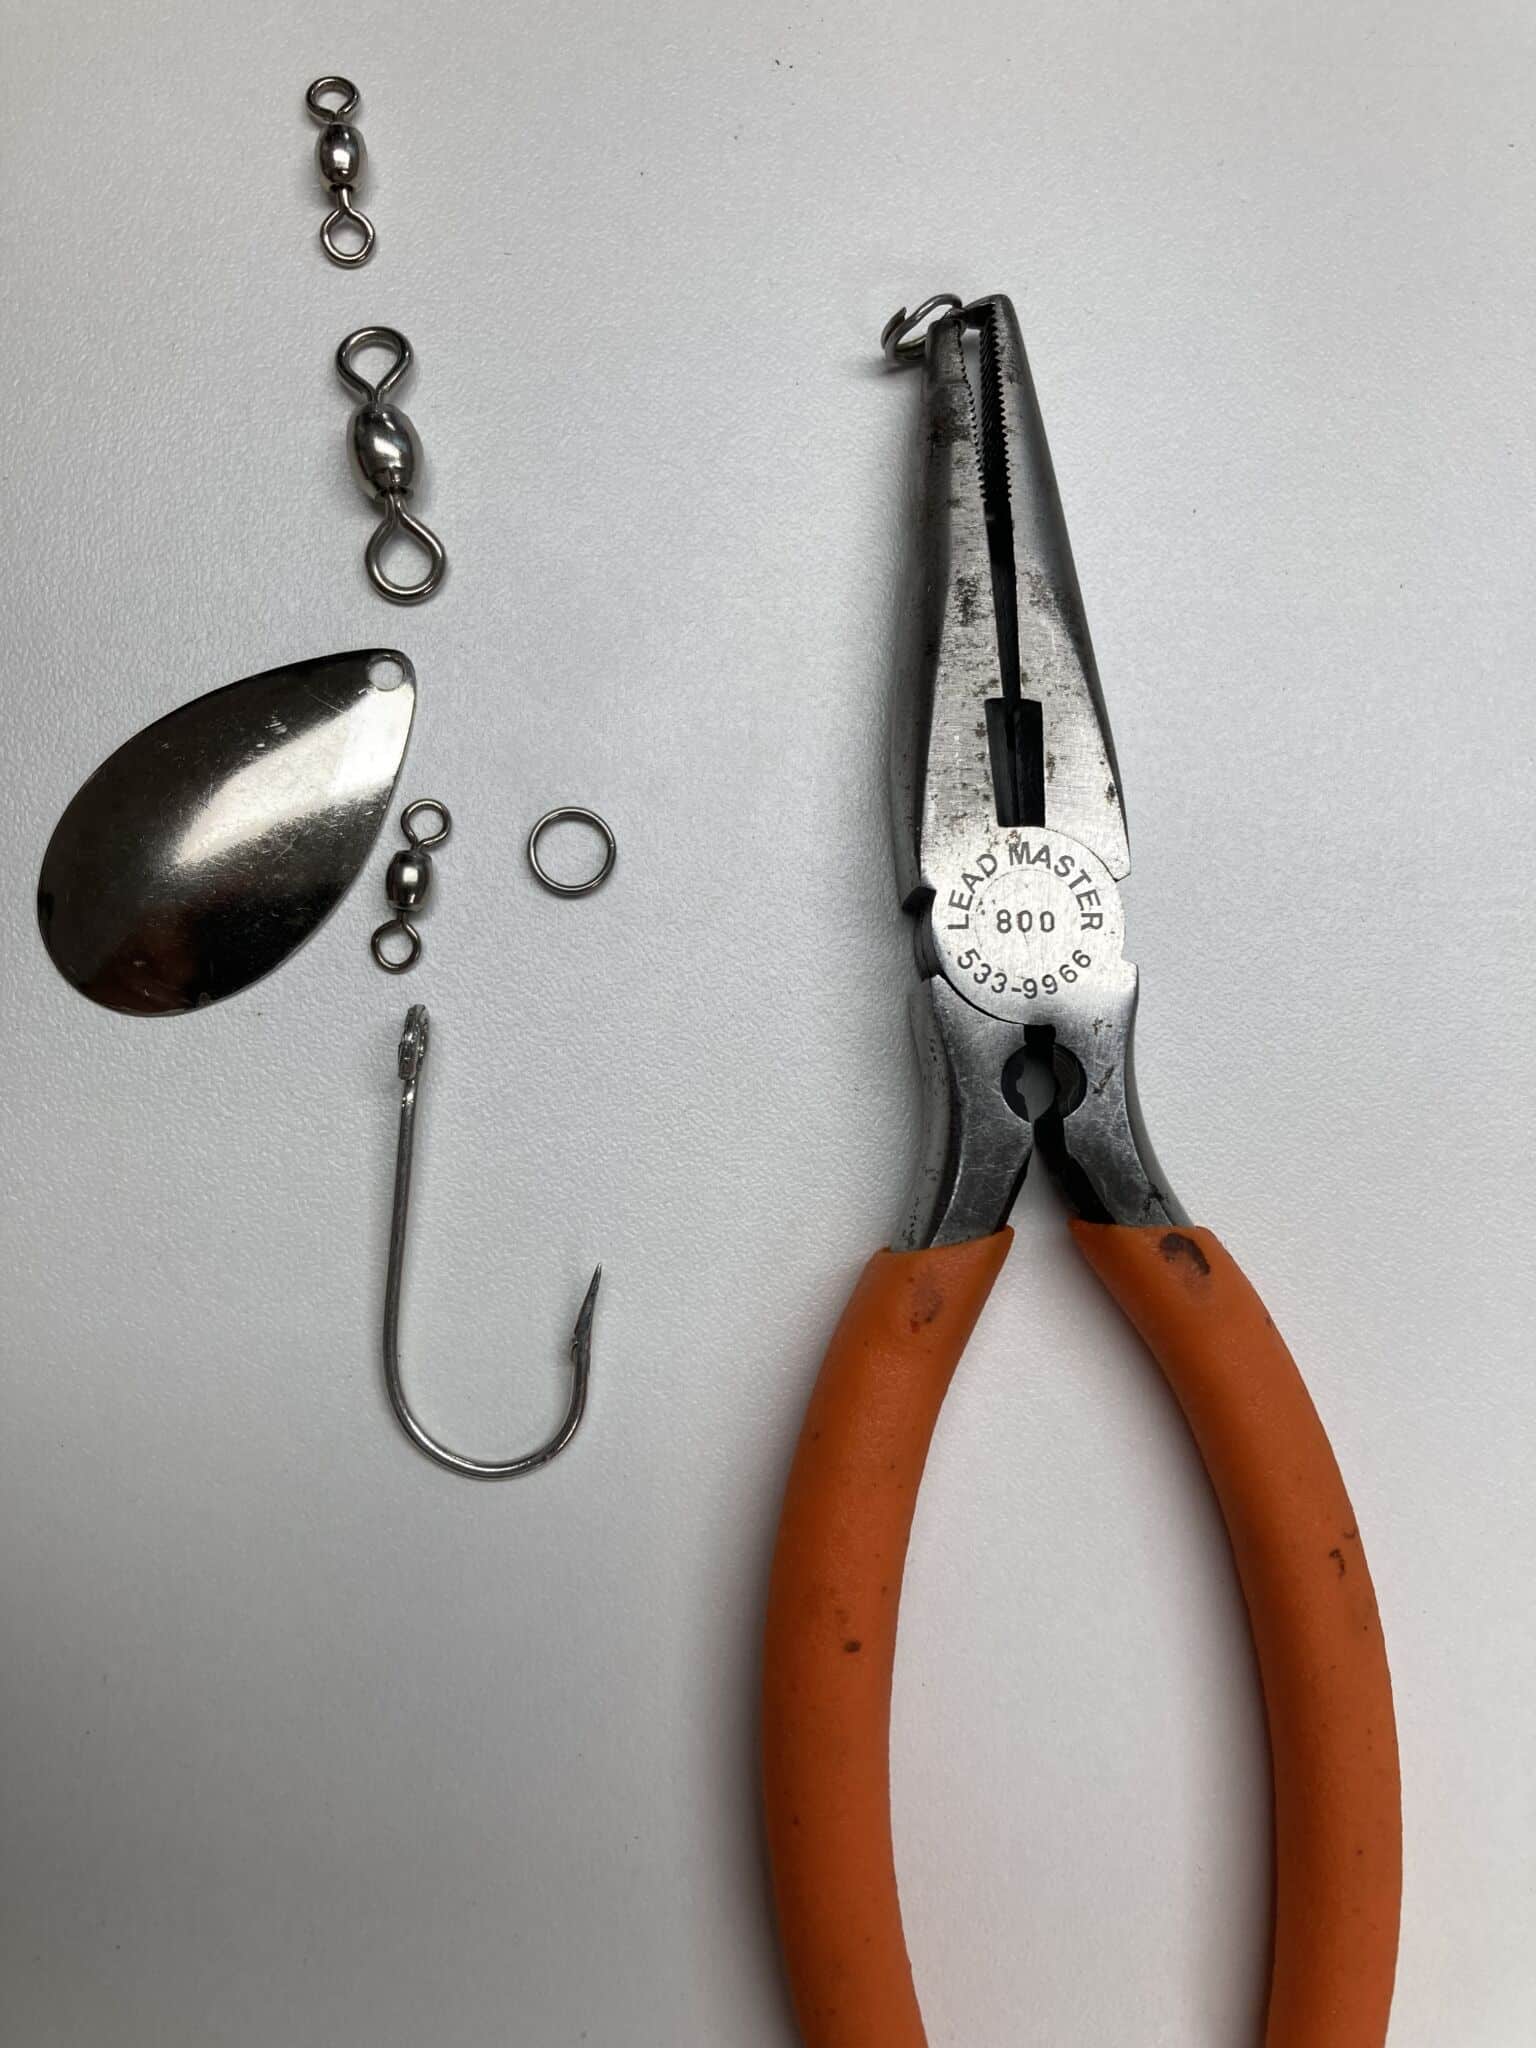
- 1. Open First Split Ring: Use split-ring pliers to spread open your first stainless split ring, then slide on the lower eye of your top barrel swivel.
- 2. Mount the Blade: Slide the blade eyelet onto the same split ring, ensuring the concave face sits cupped upward toward the swivels so current catches it instantly.
- 3. Link Second Swivel: Thread the upper eye of the second swivel onto the split ring before rotating it closed.
- 4. Attach Lower Split Ring: Mount the second split ring onto the bottom eye of the lower swivel.
- 5. Rig Hook: Attach an open-eye Siwash hook to the rear ring (or lower swivel eye) and crimp the open eye firmly shut with heavy pliers.
When float fishing spinners, mending your line to eliminate belly slack gives you direct contact with your float. Holding back gently on the spool causes river current to bite the blade harder, boosting rotation speed and lifting the spinner slightly above bottom structure.
How to Rig & Fish Unweighted River Spinners
Knowing how to make salmon and steelhead spinners is only half the battle; presenting them at the proper river depth determines your hookup ratio. Long drift rods (10 feet or greater) provide optimal line clearance to mend slack off the current. Here are the three primary river rigging setups:
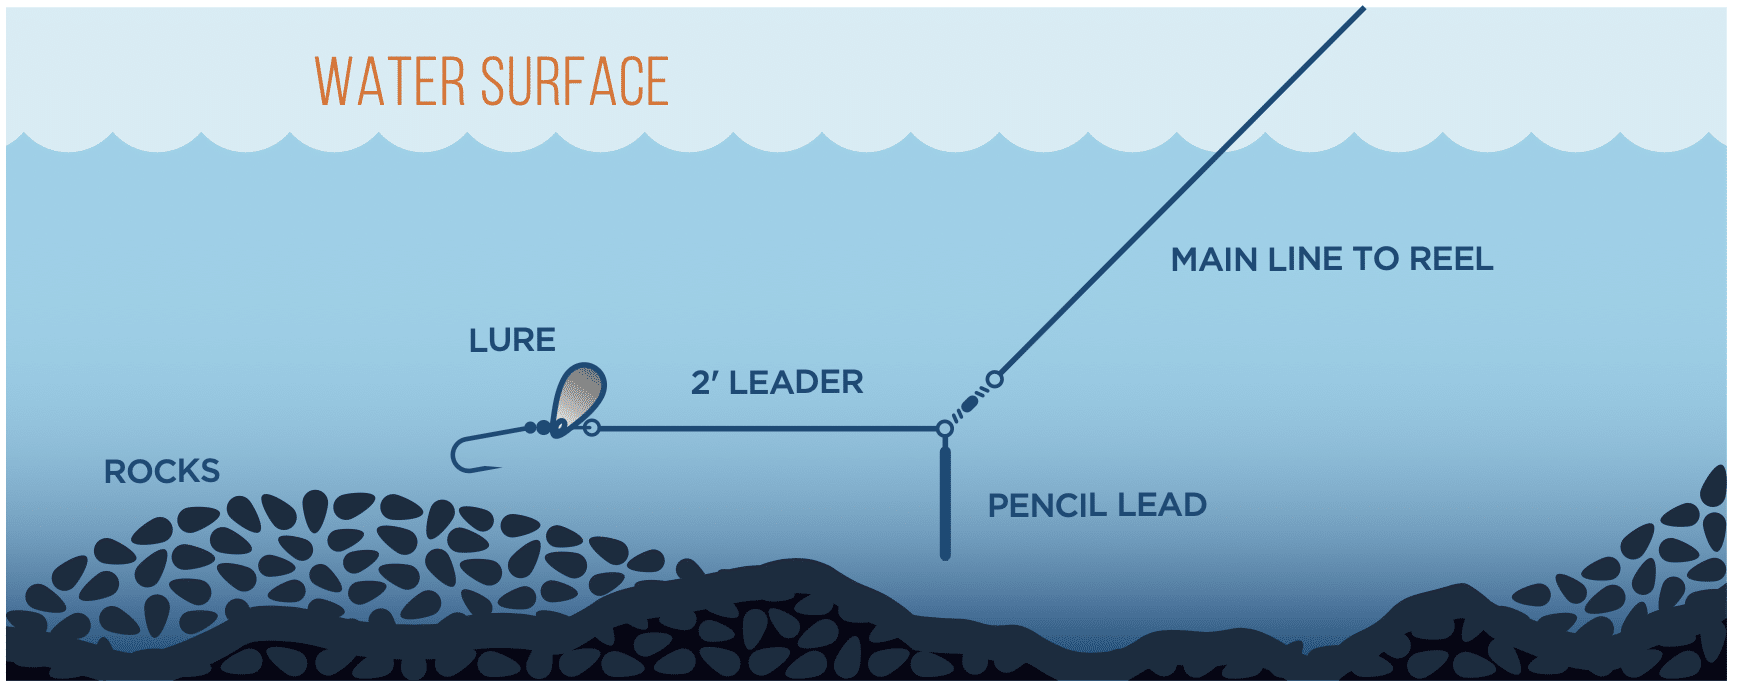
1. Bottom Bouncing
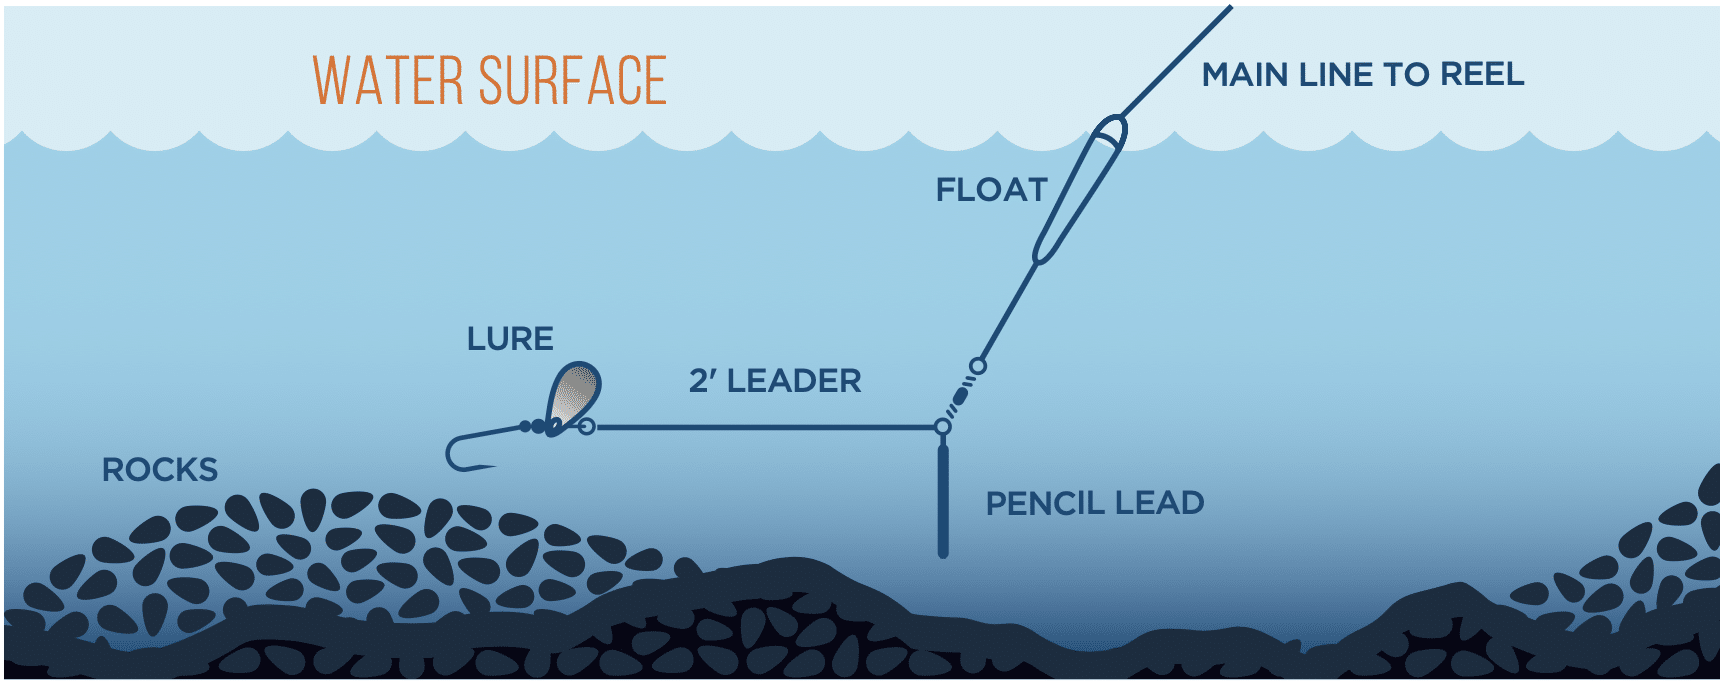
In swift, rocky chutes, pencil lead is positioned 2 to 3 feet ahead of the lure on a three-way swivel or slider dropper. The sinker ticks across the gravel while the spinner tracks cleanly behind it. Anglers must actively manage line tension to avoid snagging bottom structure.
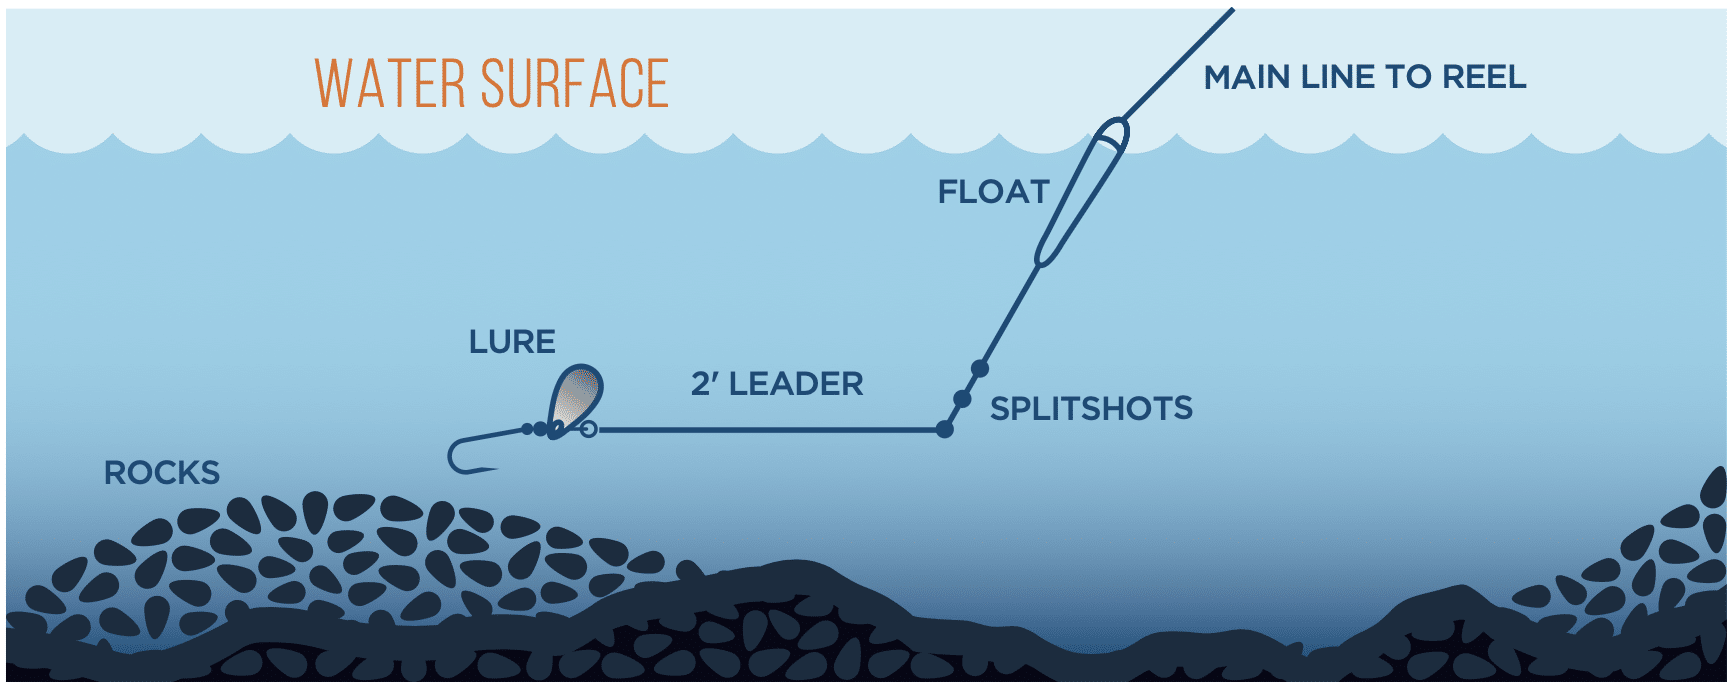
2. Short Floating
Short floating suspends the spinner in the top two-thirds of the water column, targeting suspended salmon and steelhead resting above bottom lies. Removable split shot (#2 or #3) or sliding hollow pencil lead on the mainline powers the setup above a 2-foot fluorocarbon leader. In slow pools, holding back on the drift forces the blade to rise and turn faster as resistance builds.
3. Bottom Tapping with a Float
This hybrid technique combines float tracking with bottom depth control. Pencil lead hangs beneath the float, calibrated so the lead taps the riverbed while the spinner tracks just above rocks. The float provides clear visual tracking, allowing you to mend line and control drift speed through the seam.
- Yakima Bait Co. (Hildebrandt Blades): High-grade brass and genuine silver-plated blades designed for salmon and steelhead tackle.
- Freshwater Fisheries Society of BC: Stocking reports, conservation updates, and river angling guides across British Columbia.
- BC Freshwater Fishing Regulations: Official provincial synopsis covering gear rules, bait bans, and single barbless hook mandates.
MORE RIVER FISHING & TACKLE GUIDES
Expand your river tactics and terminal gear with our top Vancouver Island guides:
Contributed by veteran river angler Gil d’Oliveira and the editorial staff at Island Fisherman Magazine. Learn more about how to make salmon and steelhead spinners and explore coastal fisheries by subscribing at Island Fisherman Magazine.