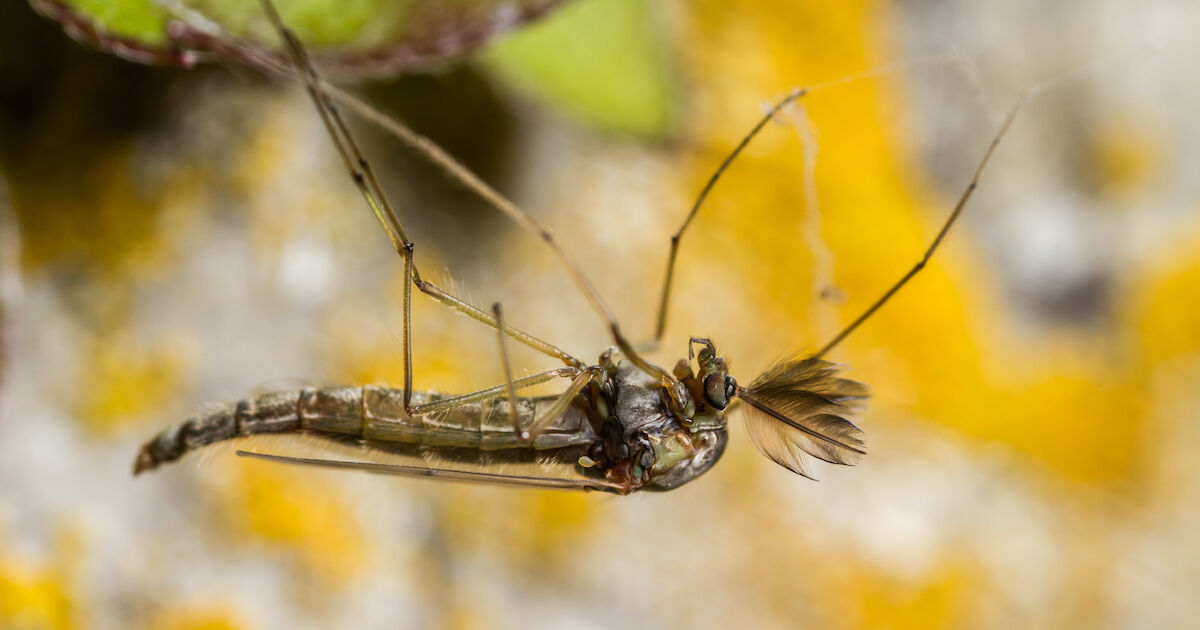
Midges are the most prolific of the aquatic insects that trout feed on, but can be an incredibly frustrating hatch to fish successfully. Midge fishing is not for the impatient. They are found in nearly all slow water or still water situations throughout the world; they do not inhabit flowing water.
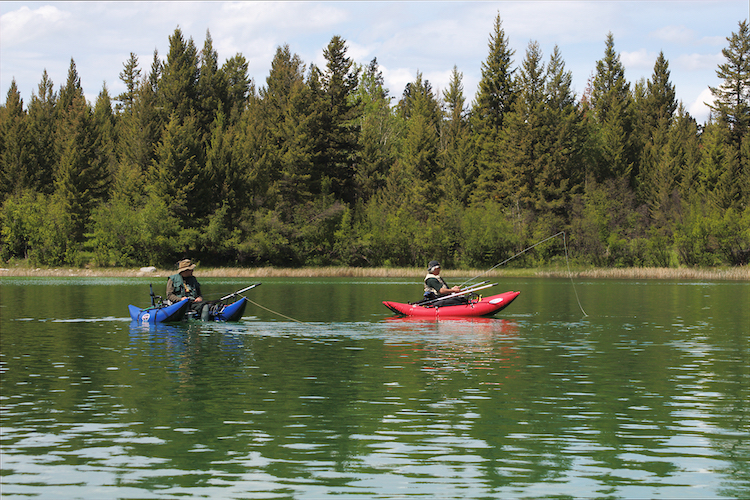
Chironomiding
Midges are part of the insect family Diptera, along with the mosquitoes and houseflies, and are often mistaken for mosquitoes. The adults have two sets of wings, but only one pair are fully formed; the other pair remain small vestigial stubs. They undergo complete metamorphosis like a butterfly; thus, they have a larval, pupal, and adult stage.
Larval (Bloodworm) Stage
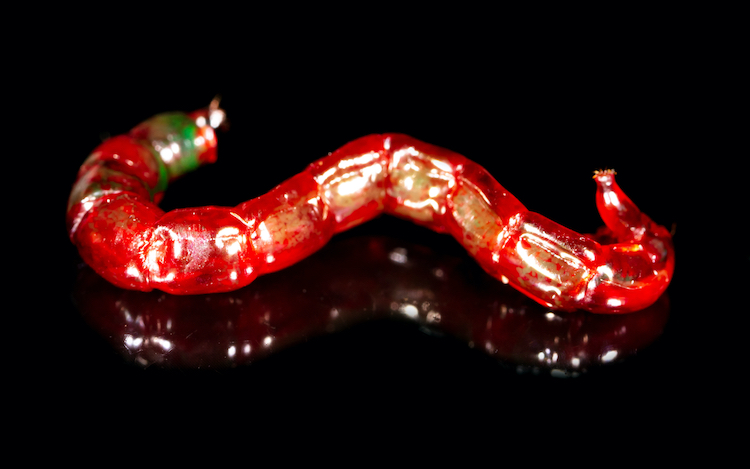
Red bloodworm
The midge hatch is always the first to occur after the ice is off of any lake. The lifecycle of the midge starts in very early spring in the muddy bottom of the lake or pond. Here, the larvae dwell in a worm- like form about 2 cm in length. The larvae range in colour, but for the most part are blood red or tan, thus their common name: bloodworm. Although bloodworms don’t move any significant distance, they do wriggle around a lot. They are available to the trout year-round but are most prolific during the spring and summer.
Any thin red fly pattern will imitate this stage of the midge life cycle well when the fish are taking the bloodworms, but two patterns I have found effective are the red Carey Special and my own larva lace bloodworm. While tying instructions can be found almost anywhere for the popular Carey, here is how to tie my simple larva lace bloodworm:
How To Tie Larva Lace Bloodworm
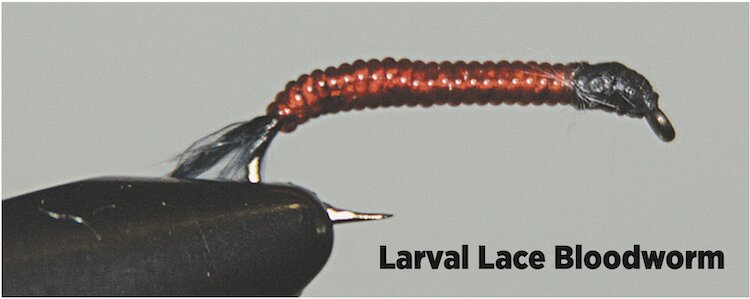
- Hook: #12 or 14 Mustad 9672
- Thread: Black monocord
- Tail: Short black marabou feather
- Underbody: White floss
- Overbody: Red larva lace (clear red plastic lacing)
- Head: Black monocord
1. Attach the thread to the hook shank and tie in, at the butt, a very short tail of black marabou. Don’t make it too thick, as you want it to flow freely and impart motion to the fly.
2. Tie in a length of red larva lace and then a length of bright white floss.
3. Wrap the floss to the head of the fly, ensuring you cover the entire shank of the hook, and tie off.
4. Wrap the larva lace to the head of the fly, ensuring you do not overlap the wraps. Tie off.
5. Create a black head by wrapping the thread around the shank behind the eye until you achieve a small smooth head.
6. Whip finish and cement.
To fish the bloodworm stage, you must get your fly on, or very close to, the bottom. In water less than 3 metres deep, I like to use a dry line and long sinking leader. Simply measure the water depth and then attach a leader of that length. Cast the fly out and allow it to sink (treating your leader with leader sink can speed that up). Once there, don’t retrieve it; simply bring in your line just fast enough to keep the slack out of the floating portion. When you feel resistance or see the tip of the dry line hesitate or head the other way, raise the rod tip and set the hook.
If the water is deeper than 3 metres, I switch to a sink-tip or full sinking line. The technique is basically the same as with the dry line, except that you will have to move the fly faster to avoid letting your whole line sink and settle on the bottom. This is not nearly as effective as the dry line method, but it still catches fish.
Pupal (Chironomid) Stage
Once the larva pupates into the pupa on the bottom, the pupa immediately starts its long, wriggly ascent to the surface. This pupal stage is called the chironomid and is the best-known stage of the insect’s life- cycle. The trout key in on the chironomids almost exclusively at this time and can be extremely fussy about the size, shape, colour, and motion of the imitation.
Once the pupa reaches the surface, it tends to get stuck under the surface film and takes a while to push through it as it hatches into the adult. While they are doing this, they hang in the film like little commas, and the trout cruise along at a leisurely pace sipping chironomids at or just under the surface. This classic rise form shows no fish at all most of
the time, just a subtle ringlet. At other times, however, you may see the top of the shoulders, then the back and then the top of the tail as the fish porpoises slowly to take a surface-film chironomid.
There are a great many patterns that imitate various colour patterns of the different species of chironomids. Two have proven more effective in more conditions across BC than any others—black and silver, and copper and brown.
Both patterns are tied identically; you simply substitute the different coloured material to make the other. Below are the instructions on how to tie the chironomid.
How To Tie Chironomid
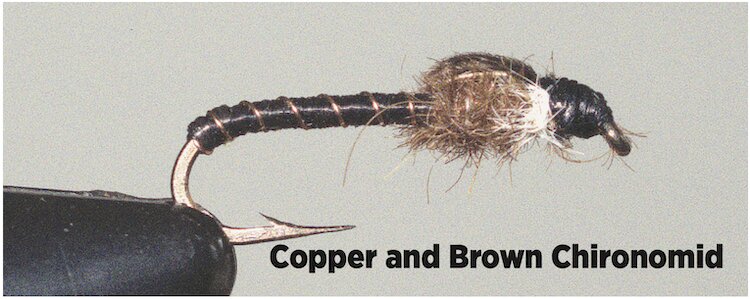
- Hook: #12 or 18 Mustad 94840
- Thread: Brown(or black) waxed
- Tail: None or short marabou to match body colour
- Abdomen: Brown (or black) floss or Spanflex
- Rib: Fine copper (or silver) wire
- Thorax: Brown (or black) floss or Spanflex
- Shellback: Pheasant tail fibres (or black hackle)
- Gills: White ostrich herl
- Head: None of thread
1. Tie in the thread and tie in a sparse, short tail of brown marabou.
2. Tie in the wire and then the floss or Spanflex at the butt of the hook.
3. Wrap the floss to a point midway between the hook point and the eye and secure. Do not cut it off.
4. Wrap the wire opposite the direction you wrapped the floss, to form a rib to the same point along the shank. Tie it off and cut.
5. Tie in the pheasant tail fibres on top of the hook shank.
6. Wrap the remaining length of thorax with the floss, building up a small bulge to form the thorax. Tie off and cut at the head.
7. Tie in one strand of white ostrich herl at the head and wrap once to form the gills. Tie off and cut.
8. Pull the pheasant tail fibres over the back and over the herl. Tie off to form the wing case or shellback. Cut.
9. Whip finish and cement.
Many fly tiers add a bead head to this fly pattern. The weight of the bead helps the fly sink faster and can add a bit of flash to the fly as well.
To tie up the black and silver version of this pattern, substitute black floss or Spanflex for the brown, silver wire for the copper, and black marabou for the brown.
There are three ways to fish the chiron- omid. One method is deep, using a full sinking line, the second method is to use a dry line and a very long leader and tippet, placing a strike indicator at the length above the fly that you want the fly to sink to, and the third is just under the surface using a dry line.
To fish the pattern deep, simply cast out your full sinking line and allow it to sink to the bottom. Once there, you retrieve the fly very slowly to the surface using a slow hand twist or VERY short strip retrieve. The fly should ascend no faster than one 6-in strip every five seconds, slower if you can stand it.
If you want to fish intermediate depths, then you use the dry line and strike indicator method. Estimate how deep you wish the fly to be and place the strike indicator at that point above the fly. The strike indicator will float, and thus prevent the fly from sinking any deeper.
Cast the fly out, allow it to sink, and sit and wait for a movement of the indicator. This method reminds me very much of bobber and worm fishing as a boy.
The third method is called the “greased leader” method. Using a dry line, tie on your fly and grease the leader with fly floatant from the tip of the fly line to within 6 inches of the fly. Cast out well in front of a feeding trout and allow the fly to sink and hang vertically from your tippet. The floatant will keep the rest of the leader on the surface. Retrieve it only fast enough to keep the slack out of the line and watch the leader as you would a strike indicator. If the leader straightens, sinks quickly, or heads the other way, set the hook.
Once the pupa manages to break through the surface film, it emerges from the pupal shuck as an adult that looks very similar to a mosquito, but without the biting mouthparts. Trout rarely feed on the adults, and although I carry some tiny black Tom Thumbs in my box as imitations, I have yet to have a fish take one for an adult midge.
Midging can be a very successful way to fish for trout. Tie up some of these patterns and carry them with you, especially in the spring and early summer. The midge hatch is one of the four major hatches, and you really shouldn’t be caught unprepared.
This article appeared in the January 2020 issue of Island Fisherman magazine. Never miss an issue, subscribe today.
Visit the Store
$34.99
$34.99
Featured Catch
Joel Unickow halibut (Photo: Rob Frawley Lucky Strike Sportfishing Tofino)
