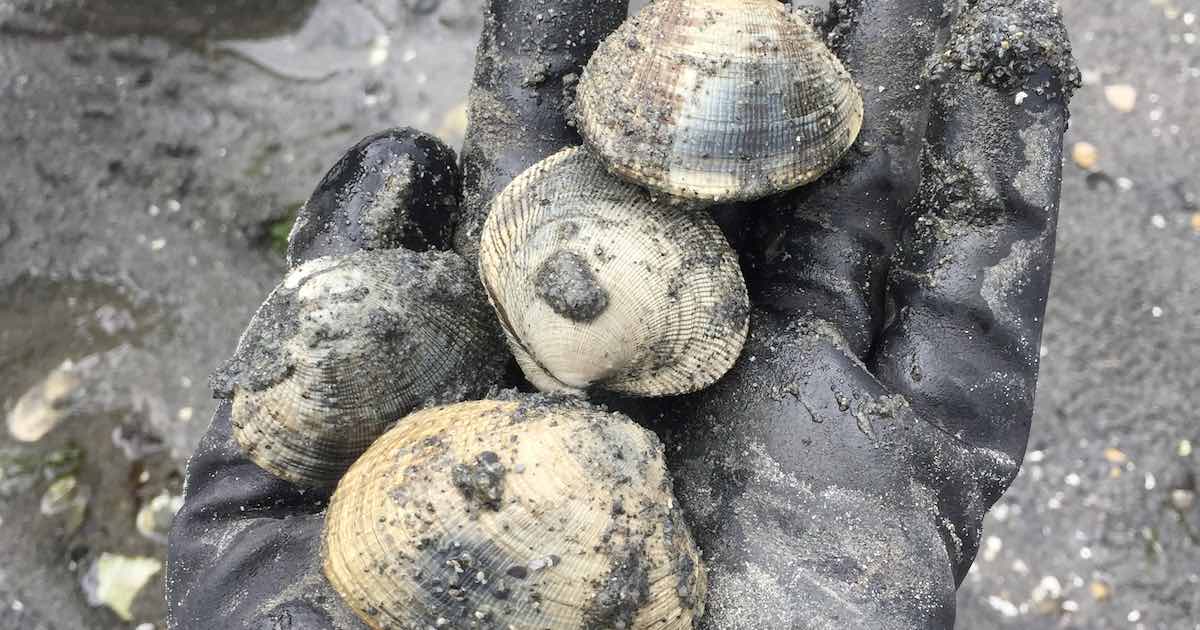
With the disappointing changes to salmon fishing opportunities as of late, now seems like a good time to discuss some of the many other seafoods that we are fortunate to have here on Vancouver Island. For me and my family, digging clams has always been a fun-for-all-ages activity that turns a good day at the beach into an even more rewarding outing.
I have noticed that many people not experienced with harvesting shellfish can be a little wary of doing so. And admittedly, this makes sense. While it is exceedingly rare, paralytic shellfish poisoning does exist. Also, as filter feeders, all bivalve shellfish must only be taken from clean, unpolluted waters. Furthermore, they have to be treated correctly after harvest if you want to have an enjoyable meal.
But with a little bit of know how, clamming is very easy. It is also great for young children, as it’s an activity that they can easily participate in. One word of warning though: Once children develop a taste for seafood, there is often less for yourself.
When To Go Clamming
So, when should you go clamming? Shellfish is generally at its best from winter to late spring. However, in my opinion, the old saying about only eating shellfish in months with an“R” is a bit misleading. This expression came about prior to refrigeration, and I suspect it referred more to commercially sold shellfish that had been transported to cities away from the ocean. I grew up eating clams at all times of the year and have never had any issues. In fact, I’ve had more trouble with restaurant seafood than I’ve ever had with anything that I harvested myself. That said, proper care and handling is vital.
I suggest clammers take a good look around before harvesting from a new beach. If there are outfall pipes, sewers, or ditches draining onto the beach, then avoid the area. Also, consider if there are live-aboard boats moored nearby or older homes that are likely to have septic fields. While I do dig clams in the summer, common sense dictates that if it’s the middle of a heatwave and the beach is roasting under a blazing sun, then perhaps harvesting any shellfish might not be a good idea.
You can get all the information regarding shellfish harvesting and and safety, as well as a map and closures from the Department of Fisheries website. They do a good job regarding shellfish safety, so it’s wise to make use of this resource. Look up the map for the local sub area you plan to dig and carefully check for any closures. With a few more clicks, you can even look at the historic data for each area.
For shellfish closures go to www.pac.dfo-mpo.gc.ca/fm-gp/contamination/index-eng.html
Where To Harvest Clams
Once you have worked up your courage to go clamming, the first thing you need to find is a good beach. Unfortunately, many of the best locations in the mid-island areas are now commercial clam leases. I either drive north up the island a bit or go to one of the Gulf Islands.
The best beaches for clamming are a sand and gravel mix. Once you have identified a likely beach, you need to get out your handy Island Fisherman Tide and Bite Guide and look for some good low tides. Some beaches are doable with a low tide of 4 ft or less. Or better still, identify the few zero tides of the year and head out then. Before I had young children, I rarely missed a zero tide; whether day or night, I’d be there. I especially enjoy the very low tides at night in the winter. Shellfish are at their prime then, and a meal of fresh seafood in the winter is always a treat. One particularly memorable clamming expedition for me was the first time I took my lovely girlfriend (now wife) on a midnight clamming adventure. As I recall, she had a quizzical expression on her face as I packed up buckets, shovels, flashlights, and gumboots and told her we were going to the beach. I don’t recall how long we had been dating, but she trusted me enough to head out to a secluded beach in the dark with a shovel. It was a dry crisp winter’s night with a sky full of stars. We walked down the trail and popped out onto the beach only to find several other groups of clammers happily digging away in the dark. We ended up having a wonderful night chatting with the other clammers and sipping on cinnamon whisky. Ever since then all I have to do is say, “There’s a clamming tide coming up,” and my wife is packing up the gear and kids up for another adventure on the beach.
Gear For Clamming
The equipment is really very basic. A bucket, a shovel, boots, and rubber gloves are all you really need. I prefer a proper narrow clam shovel, as regular garden shovels seem to break too many clams. A clam fork works equally well. And while a bucket is fine, a mess bag like a diver collection bag is ideal, particularly as you can use it to rinse the clams clean of sand more easily. A burlap sack can also be used for this task.
Now speaking of sand, removing the sand from the clams is key to an enjoyable meal. Nothing ruins a meal of clams like a mouth full of sand. Therefore, after you harvest the clams, soaking them in buckets of clean fresh ocean water is critical. I change the water once a day so the clams have an adequate supply of oxygen. I generally get the water from a rocky or gravel beach with vehicle access. You can just get the water from your clamming beach, but lugging buckets of water for long distances is not my idea of fun. I also give the clams a good scrub with a dish brush to remove any sand or debris from their shells. Also, many people (including my mother, who is an expert at clamming) swear that adding a handful of uncooked oatmeal or cornmeal to the clam bucket is beneficial. The thinking is that the clams will suck in the oats and expel the sand in their digestive tract. I’m not sure If this is necessary or not, but as with most traditional knowledge, I tend to follow the advice of my elders.
Before You Eat Clams
I like to give the clams two full days in clean water to expel all the sand. After that it’s time for a clam feast. First, check each clam to see that it’s still alive. A living clam will be tightly shut when handled. Discard any clams that stay open, as they have died. However, once cooked they should be part way open. Any that are still tightly shut after cooking should also be discarded. I generally steam them in batches with a little fresh dill for about ten minutes. Make sure to retain the cooking liquid for use in chowders; just leave the last inch of liquid behind in case there is still a bit of sand in the bottom of the pot. Once cooked, I usually serve them with a salad and French bread. I always make garlic butter, but half the time it doesn’t get eaten, as fresh clams are so tasty on their own. Another easy way to cook them is wrapped in tinfoil on the BBQ. Any leftover clams can be frozen in the cooking liquid for future use.
Clamming Regulations
A final note about regulations. The 2019 season, when this article was written, there was a minimum size restrictions of 35 mm for Manila and littleneck clams and 55 mm for butter clams. Honestly, clams smaller than that are not worth taking anyway. Also, count your clams as you pick them, as you don’t want to get more then the limit of 75 (always check current regulations).
So, head out for a fun day (or night) on the beach. And remember the old west coast saying, “When the tide is out, then the table is set.”
This article appeared in the July 2019 Issue of Island Fisherman Magazine. Never miss an issue and subscribe today!
One Comment
Leave A Comment
Visit the Store
$34.99
$34.99
Featured Catch
Joel Unickow halibut (Photo: Rob Frawley Lucky Strike Sportfishing Tofino)

Great article! Any tips on preserving clams, like freezing or smoking or brine solutions or anything?