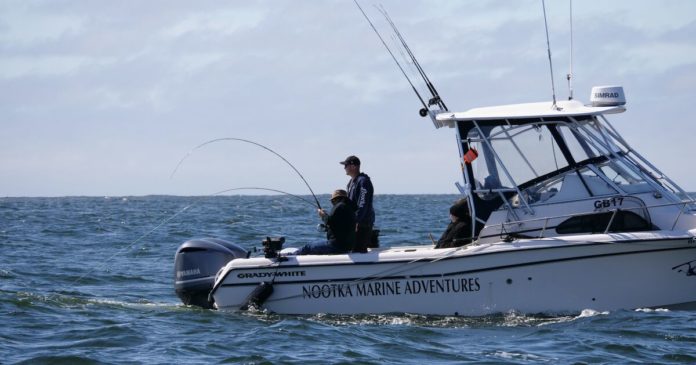
After many years of salmon fishing, much of that time running flashers, I’ve discovered breakaway flashers. They’re the best thing since sliced bread.
Figure 1 shows one of my favourite flashers modified for breakaway operation.
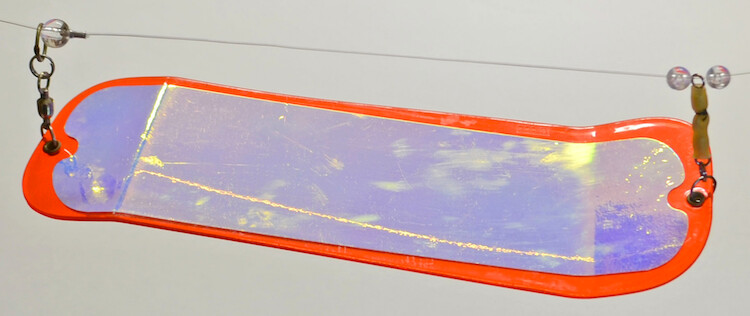
The line from the rod passes through a #9 welded ring (shown on the upper left) and a 12-mm clear plastic bead. The bead is held in position by a crimped aluminum stopper. The flasher can slide as far up the line as the rod tip, but no further down than the 12-mm bead and stopper.
The bottom end of the flasher (shown on the right of the image) is attached through a simple breakaway device to a 1/0 barrel swivel, which slides on the line. When a salmon strikes, he pulls against the rod tip instead of the flasher, so strikes are very clear. Then when the salmon whips his body from side to side or begins his run, he pulls against the breakaway device and it releases from the flasher, which then hangs from the #9 welded ring at the front. The flasher slides up the line, often to the surface. Essentially the angler plays the salmon as if the flasher is not there. Catching small salmon is a lot more fun, and trophy salmon can be fought with confidence.
I’ve tried several commercially available breakaway rigs (the Gibbs Farr Better flashers work very well), but my preference is to modify existing flashers. This gives me more choice in flashers and also allows me to continue to use my favourites.
Figure 2 shows the top end of the flasher.
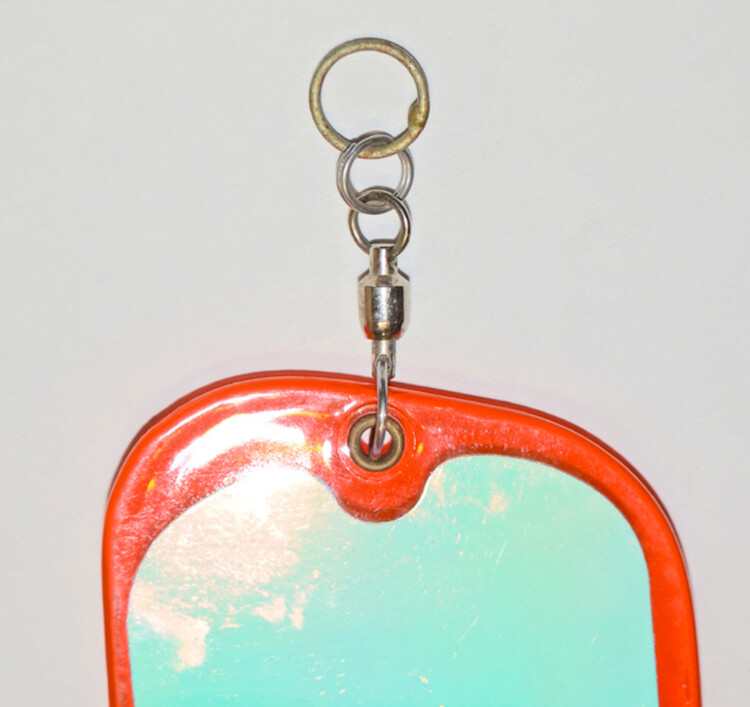
Add a #6 split ring and a #9 welded ring, as shown. The #9 welded ring might be difficult to find, so one option is to cannibalize an old flasher.
Figure 3 shows the bottom end of the flasher.
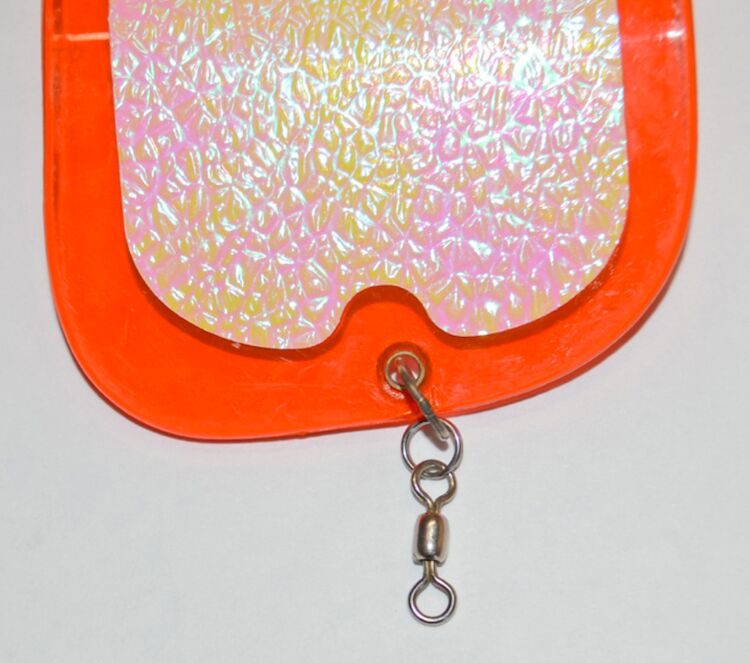
Remove the ball bearing swivel and add a #6 split ring and a 1/0 barrel swivel.
The leading edge of the breakaway rig is shown in Figure 4.
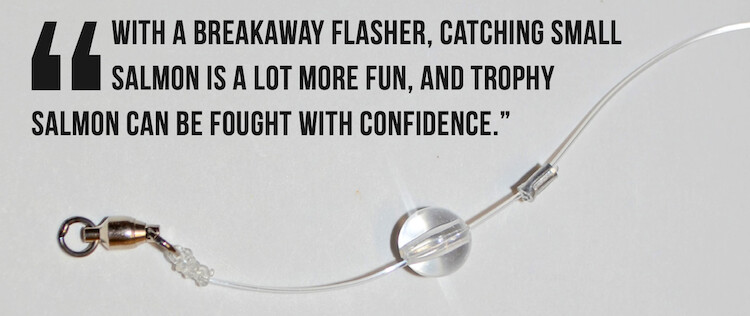
Start with a 23” piece of 80-lb monofilament line and tie it to a #4 stainless steel ball bearing swivel. Make sure that the outer shell of the swivel is facing upstream as shown, so water, dirt, and algae are not swept inside the swivel as it rotates. I use a knot instead of a crimped connection so the #9 welded ring on the flasher is less likely to catch as it slides up the line. The bead is 12 mm, which is larger than the inside diameter of the #9 welded ring, preventing the welded ring from sliding down past the bead. The bead is held in position with an aluminum crimp stopper.
Figure 5 shows the trailing edge of the breakaway rig.
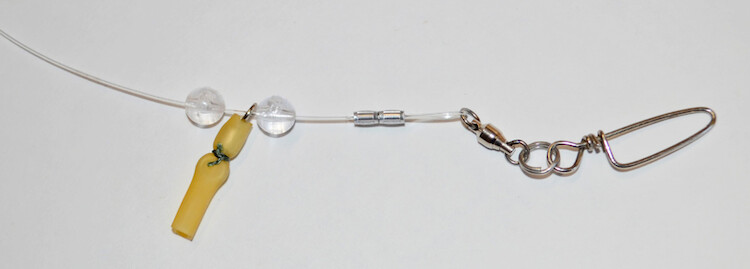
The breakaway device is a piece of 1⁄4” outside diameter (about 5⁄32” inside diameter) surgical rubber tubing. This is available at fishing supply stores and is commonly used by drift fishermen for securing pencil lead weights. Cut the tubing 11⁄4” long and slide it over a 1/0 barrel swivel, and tie to the barrel swivel as shown. The two clear plastic beads are 10 mm. I use a crimp connection to secure the 80-lb monofilament line to a #4 stainless steel ball bearing swivel, taking care again to ensure that the outer shell of the swivel is facing upstream. A #6 split ring is used to connect the swivel to a snap (recovered from the flasher).
Thread the leading edge of the breakaway rig through the #9 welded ring on the flasher and attach to the fishing line. Then insert the 1/0 barrel swivel at the bottom end of the flasher into the surgical rubber tubing of the breakaway device, attach the terminal gear (the leader and a hoochie, bait, or spoon) to the snap, and you’re ready to go.
As it rotates, the flasher will make approximately a 5′ arc, and the purpose of the breakaway device is to keep the top end of the leader within about two inches of the flasher, so the flasher provides action to the terminal gear. Since the breakaway device slides on the line, there is very little tension on the break- away device—the surgical rubber tubing can be set so that it holds the flasher very lightly, if desired. I usually slide the surgical rubber tubing over the entire barrel swivel when I’m fishing for springs or big coho, and just over the lower part of the barrel swivel when I’m fishing for smaller salmon so it releases easily.
This article appeared in Island Fisherman Magazine. Never miss another issue—subscribe today!


