If your vehicle doesn’t have a backup camera, and you are often alone hooking up your boat trailer, this article could very well change your life. There’s nothing more frustrating than loosing the game of “back-up-and-hope” multiple times to try to perfectly align your trailer ball with a hitch. I don’t know how many times on average it takes me to get it right. Sure, there are times when I’m completely one with the force, but there are other times (of course when I’m leaving late for a fishing trip) when the backup gods are enjoying a good deep belly laugh as I rack up the steps on my Fitbit … back and forth, back and forth. And I checked—it turns out there are therapy groups for this. And 9 out 10 of those therapists agree: You should install a backup camera.
When looking at aftermarket backup cameras, you are going to want something that is easy enough to install yourself and fits your budget. If you are happy to pay more $1,000, then just ring up your local car stereo shop or dealership. They’ll do it right, they’ll do it clean, and it will be warrantied. In my mind if I had $1,000 to spend on a backup camera, I may as well just hire someone to come and hook my boat up for me. Maybe he can also fetch me a cold one while I watch. No, $1,000 is a little more precious to me, there are plenty of other fishing and boat-related things that I could easily justify spending that kind of cheddar on. Wait, sorry…I meant the family, of course.
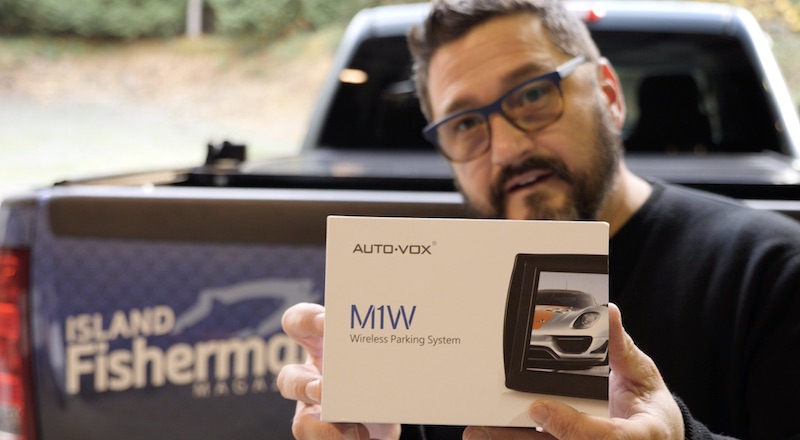
I must have spent 2 years cruising the isles of Canadian Tire and poking around online until I bumped into one on Amazon. For $111.00 I decided to give the Auto-Vox M1W Wireless Backup Camera Kit a try, and I haven’t been disappointed.
If you have 30 minutes to an hour, some basic tools, and a basic understanding of your vehicle’s electrical system, this bad boy is for you. Hookup is a breeze, and you can stow the backup screen and only use it when you need it. Here’s the how-to:
Find a Location for the Transmitter
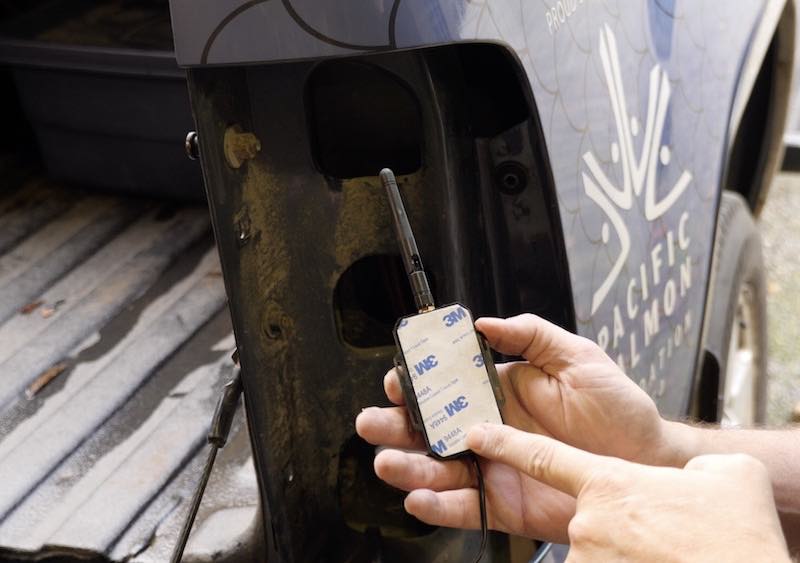
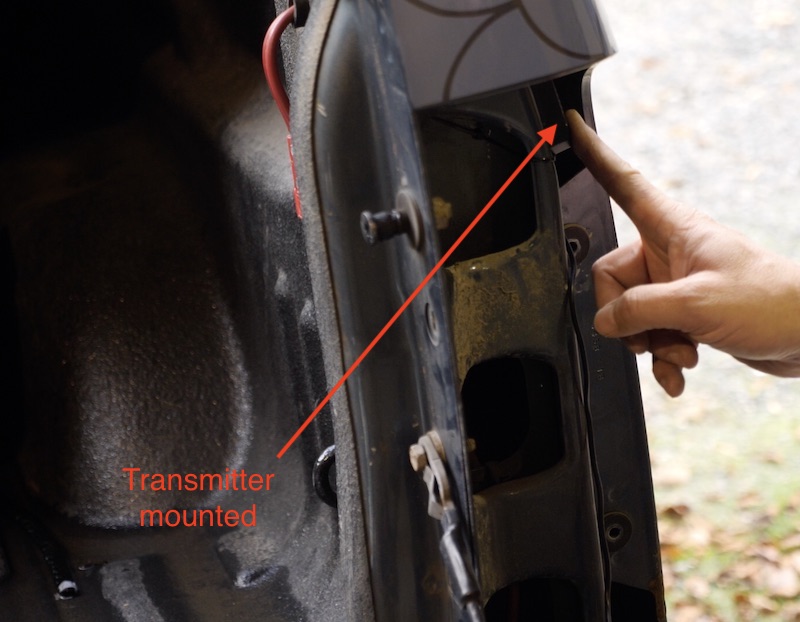
The transmitter is a is 2-inch rectangle that has holes for zap-straps/zip ties and a very adhesive 3M sticker. I mounted this behind my left rear light panel, as high as I could to keep it away from debris and water. I also elbowed the antenna into an “L” shape, which gave me a little more room. Mounting behind the light is a good spot. It’s protected, and it’s close to the where you’ll need to draw power—the reverse light.
Attach Power for the Transmitter to the Reverse Light
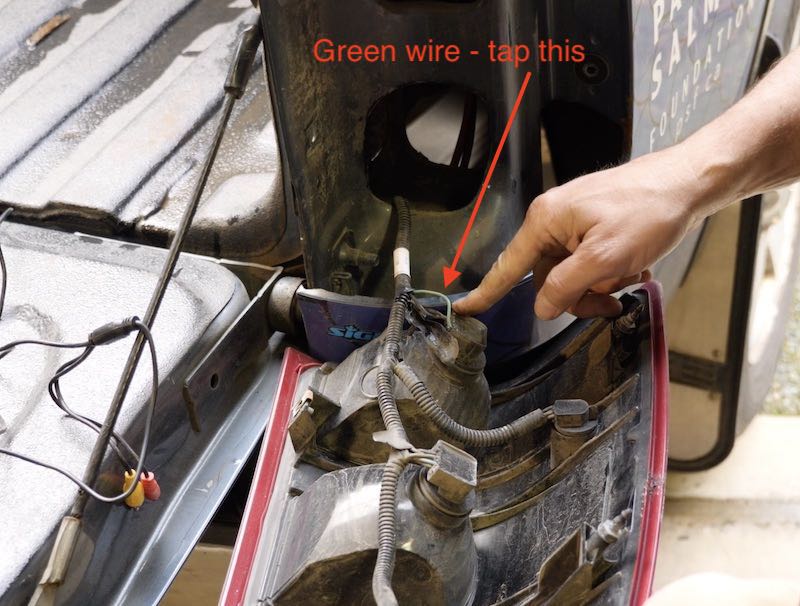
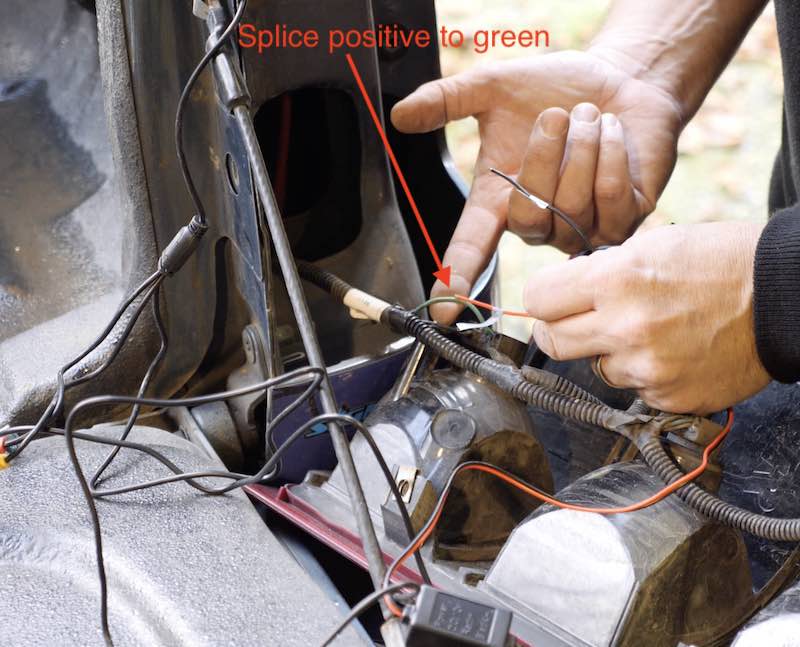
You’ll only want the video to activate when you put your vehicle in reverse, so locate the power wire to your reverse bulb. On my GMC HD 2500, it was the green wire. The kit comes with “clamps,” otherwise known as wire connectors or splicers. While it’s OK to very quickly and easily use those, I opted to cut the wire to my reverse light, solder in the transmitter wire, coat with liquid electrical tape and then heat shrink it. I’m no electrician by any means, but I figure do it right and do it once. This was enough to make me feel like it would last. So that takes care of the positive connection. For the ground, I simply tapped a small screw into the body behind the rear light. It’s completely hidden, and a good solid way to complete the circuit—negative ground.
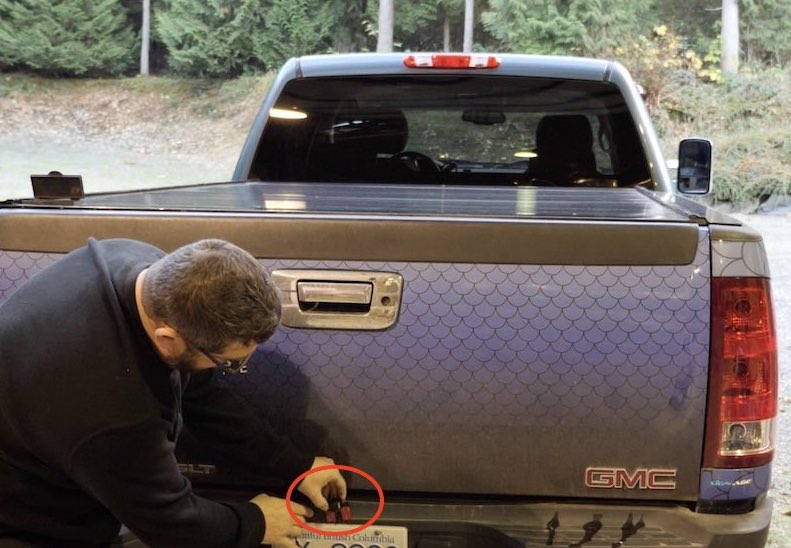
Secure the Camera Behind the Licence Plate
The camera comes with a backing plate and more of that adhesive tape so you can stick it to your vehicle, your licence plate, or both. I chose to sandwich the plate between the licence plate and the body. It’s really not going anywhere.
Attach the Wire from the Camera to the Transmitter
For this, get some good zap-straps/zip ties. Thread the wire from the transmitter along somewhere that you can secure it with the straps easily, neatly, and out of the way of any moving pieces. Oh and here’s a little tip. The camera and the transmitter attach together by means of RCA plugs. Without going fancy, just do yourself a favour and wrap them well with electrical tape. Less chance of coming apart or touching metal and causing interference on your video picture.
Plug the Monitor Into the Cigarette/Accessory Plug
This is really cool. The monitor has a sticky suction cup for mounting on your dash or windshield and it’s powered by a simple cigarette/accessory plug. I found this a really nice feature, as I don’t have to take apart the carpet or the dash to hide a permanent wire. And when I don’t need it, I can store it. Once less thing on my dash to distract me—I like it.
Power up the vehicle, put it in R, and guess what? You got video! It couldn’t be simpler!! Actually, that’s not true. After I got this completely installed I found something else online called the iBall Backup camera. The transmitter and camera are built into one small box that’s powered by a rechargeable lithium battery so there’s no wiring involved at all, and you can use it on all your vehicles. It also has a magnet on it so you just stick it to your hitch, then plug in the monitor in your cigarette adapter. It seems you always find a better solution once you have installed one, but alas, at least I found solace in the fact that the iBall starts at $230 and my solution was just $110.
Now if only there was a device for helping people back their trailers up at the boat launch. Don’t say “Try a West Coast Thumper”—that’s not going to garner the results we all want. That’s it for this one, happy hooking up!
Visit the Store
$34.99
$34.99
Featured Catch

Joel Unickow halibut (Photo: Rob Frawley Lucky Strike Sportfishing Tofino)

